Manage Cloud Sync for an existing Invite
How to turn on Cloud Sync for an Invite that has already been sent out to clients
If you're having trouble with Cloud Sync, be sure to check out our Cloud Sync Troubleshooting Guide for step-by-step solutions and helpful tips.
Sometimes the option to link an Invite to the cloud is missed, but not to worry, it's easy to enable this for an existing Invite, and sync previously uploaded files over. This guide will show you how to go into your Invite and Resync your files to the Cloud.
-
Different users will have different cloud settings, so ensure the Cloud Integration has been setup for the User. For Google Drive click here to see how.
- Cloud Sync is Invite specific and needs to be turned on for each Invite you require.
- Cloud Storage syncing is available on the Pro and Team plans. Find out more about the different FileInvite plans .

See our other guides:
-
Manage the Cloud Sync for a new Invite here
-
Integrate with OneDrive Business here
-
Integrate with Google Drive here
-
Integrate with Box here
-
Integrate with OneDrive here
-
Integrate with Dropbox here
In this guide:
-
Manually synchronise an existing Invites file uploads to your Cloud Platform

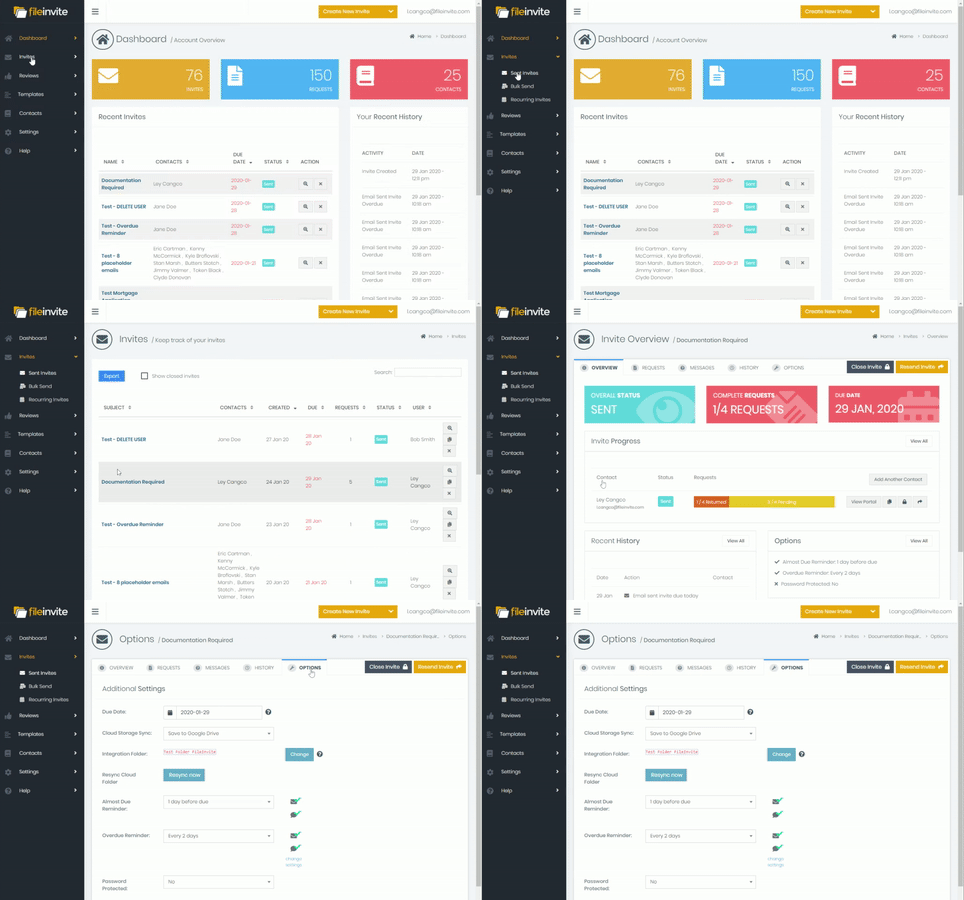
1. Navigate to the Invite you'd like to edit
2. Select the Options tab of the Invite

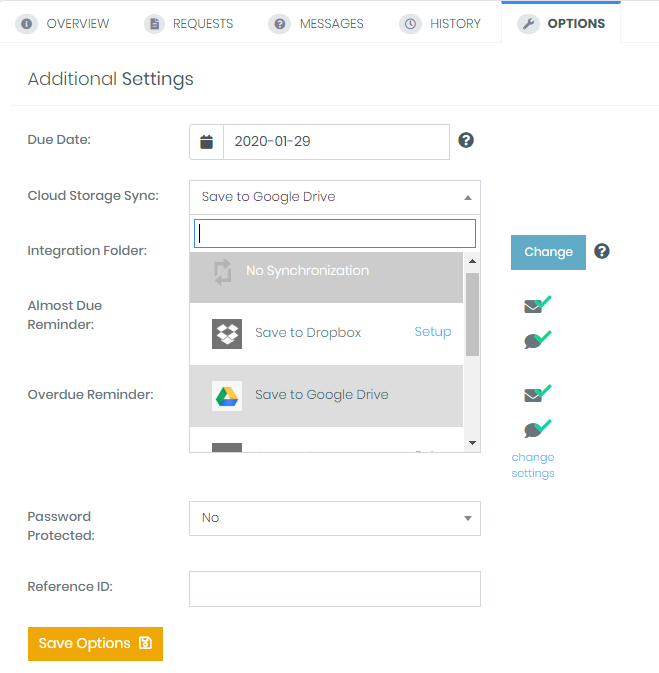
3. Choose your Cloud Platform from the dropdown

4. Once selected Click Save Options to bring up the option to Resync existing Request Uploads
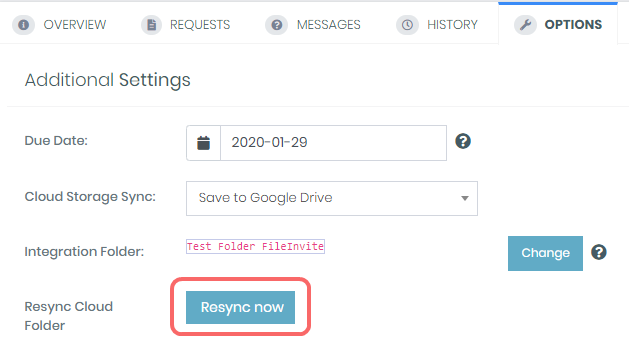
5. Hit Resync Now and give us a few minutes to get your files across. You'll see the below message if the integration is working.


🎉One less thing to worry about! Now your files will update on the Cloud as your clients work on them! 🎉