Master Users have access to all available settings; options for other user roles will vary. Master Users in Enterprise plans can set up custom roles to grant access to specific Settings pages.
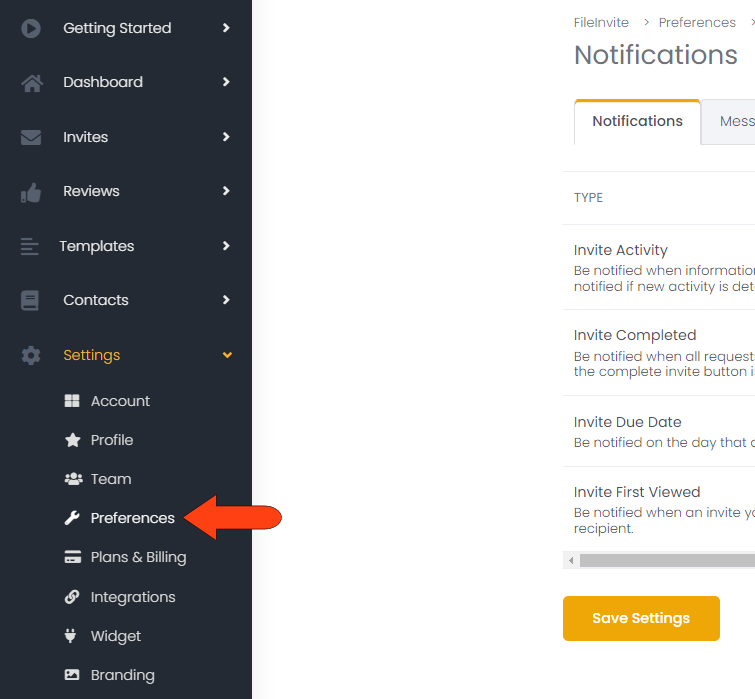
Settings for notifications, messages, and files are found in Settings / Preferences.
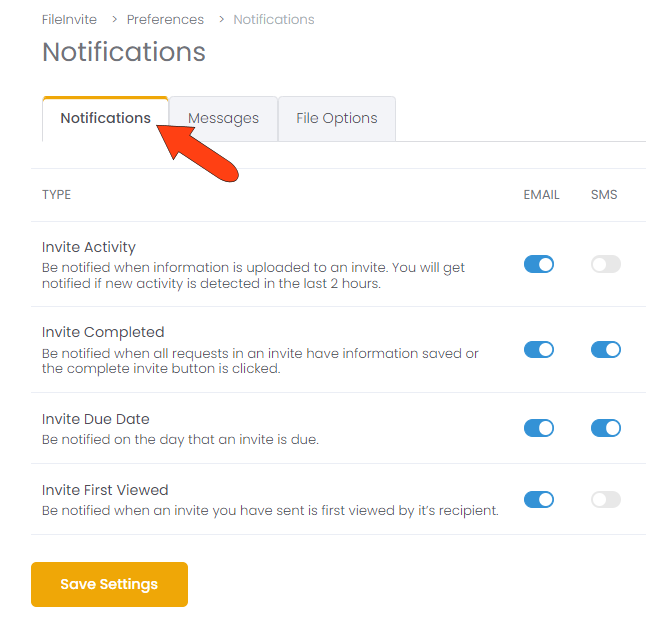
The Notifications tab of the Preferences has options for notifying you about your Invites. Choose whether you’ll receive an email or SMS when new information is uploaded when an Invite is completed, when an invite is due, and when a contact first views an Invite. If you make any changes, click Save Settings.
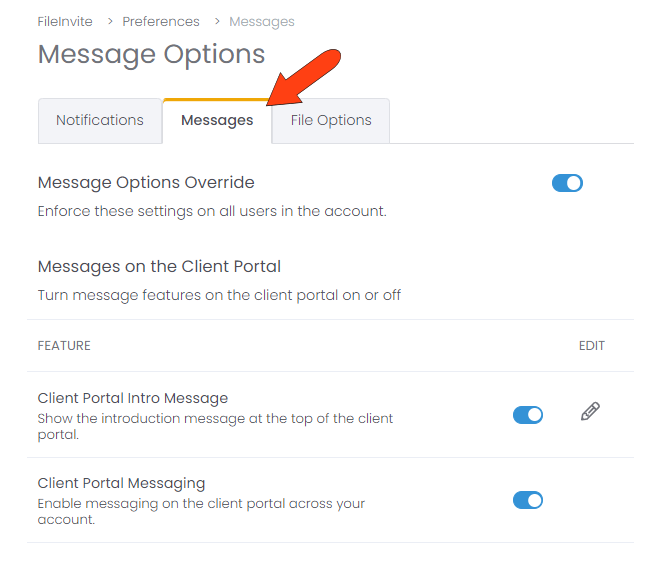
The Messages tab has options for messages in the Client Portal, and for messages sent to contacts related to Invites.
The slider at the top enables you to use these settings for all users in your account. Below this are two settings for Messages on the Client Portal: whether the introduction message will be shown at the top, and whether the messaging feature will be enabled.
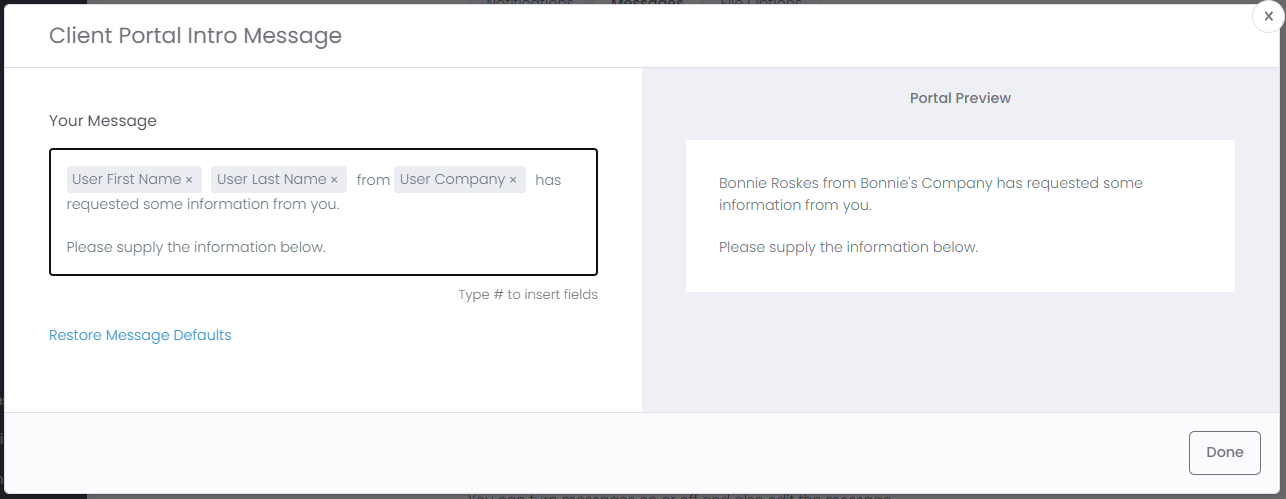
If the Client Portal intro message is enabled, you can click the Edit icon to customize it. Edit the default message on the left, and its preview appears on the right. To enter an auto-filled field for your first name, last name, or company, start by typing the # symbol.
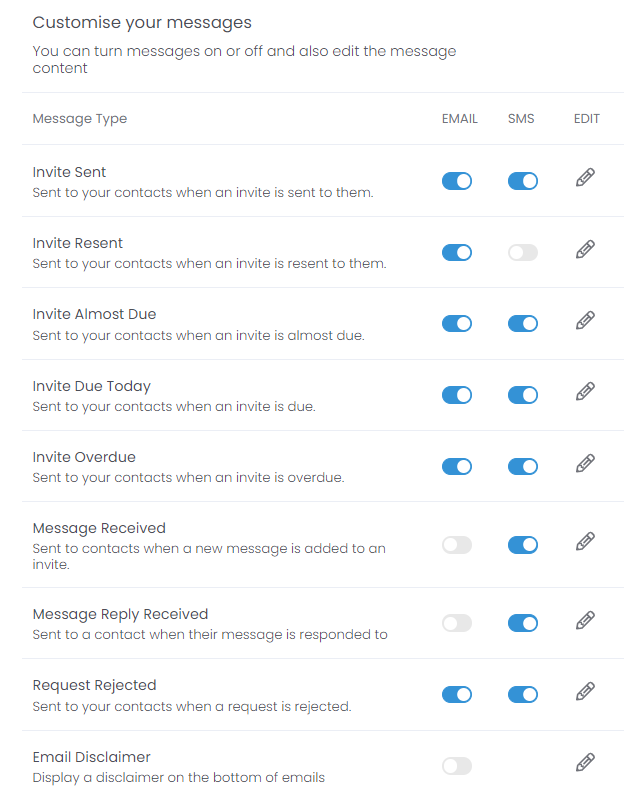
The Customise your messages section lists all messages that can be sent to a contact related to the Invites sent to them. These include messages about Invites sent and resent, almost due, overdue, etc. For each message, choose whether the message will be sent via email, SMS, both, or neither. Each message can be customised by clicking its Edit icon.
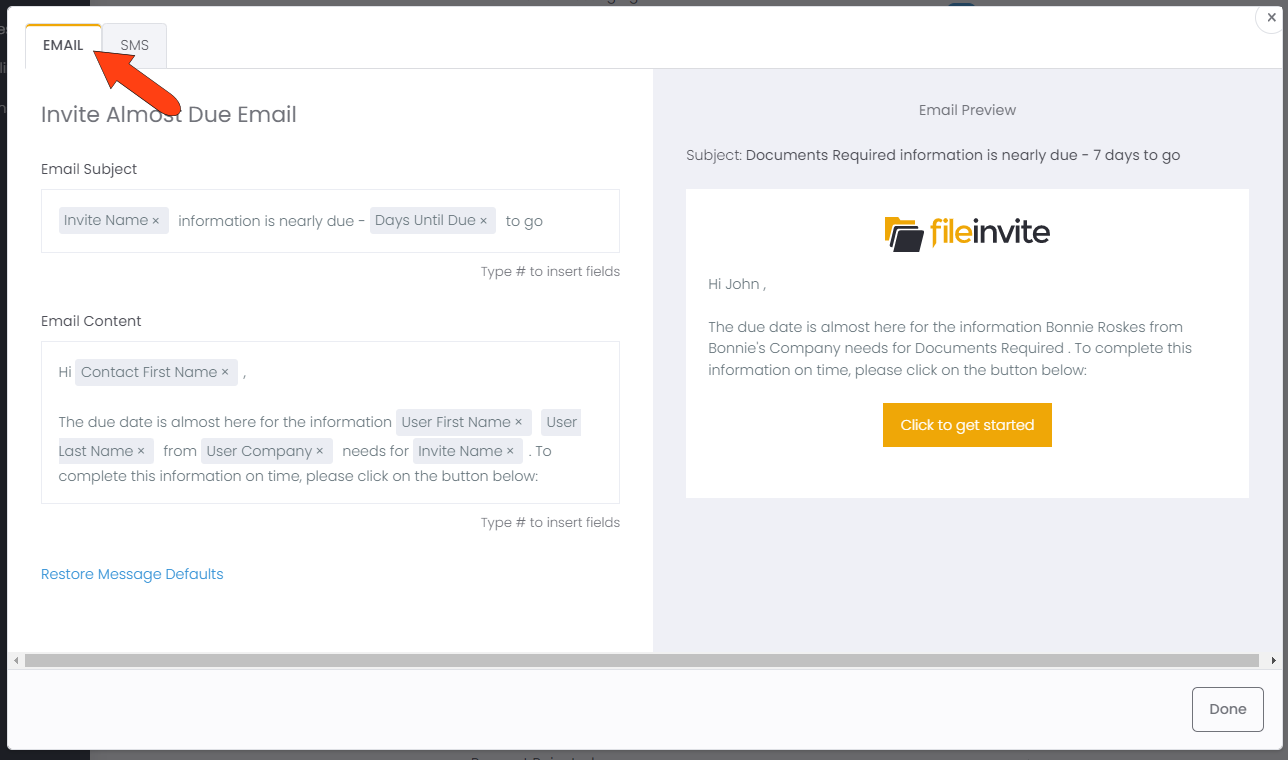
As with the Client Portal message, when customising a contact message, choose the Email or SMS tab. Edit the default message on the left, and its preview appears on the right. To enter an auto-filled field, start by typing the # symbol.
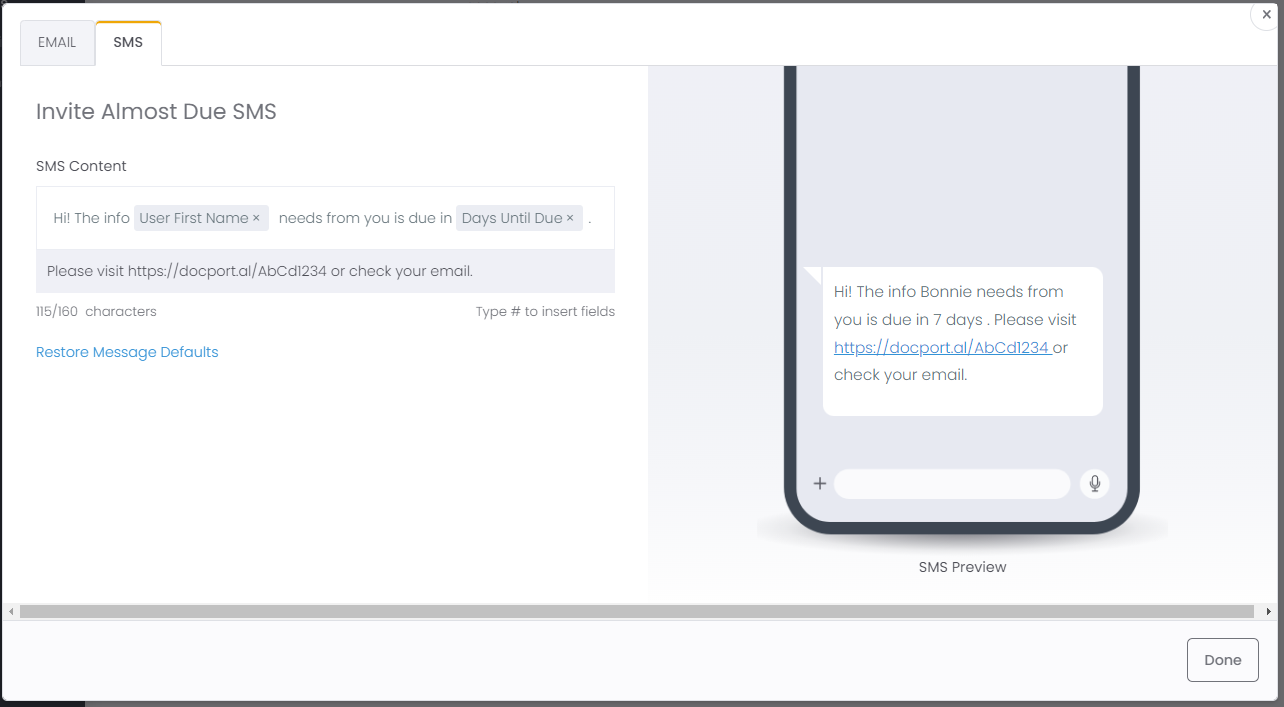
The preview on the SMS tab shows how the message will look on a mobile phone.
If you make any changes, click Save Settings at the bottom.
Important:
If the "Invite Sent" message type was previously turned off and you’ve just enabled it, this will only affect new invites going forward.
For invites created before enabling this setting, you’ll need to:
-
Ensure that "Invite Resend" message type are also enabled
-
Then resend the invite using the steps in this guide:
👉 How to Resend an Invite