Accessing and Reviewing Uploaded Documents
Learn how to access, review, and manage documents uploaded by your clients through FileInvite. This guide covers viewing file statuses, previewing documents, accepting or requesting revisions, and downloading files.
If your Fileinvite Login URL ends in fileinvite.com, please use this knowledge base instead: https://help.fileinvite.com/
Getting Started
Your client must have uploaded at least one document to the Invite for files to be available for review.
Open the Invite
- Navigate to your FileInvite Dashboard
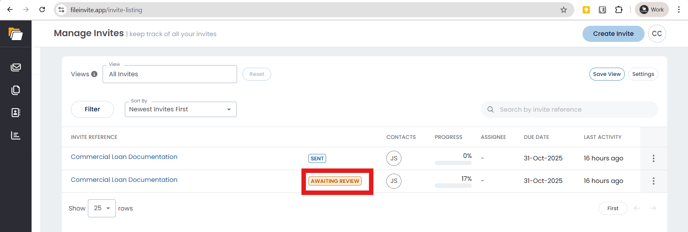
- From the sidebar, select Invites > Manage Invites
- Look for Invites with an Awaiting Review status—this indicates your client has uploaded files that need your attention
- Click the Invite to open it
Understanding Request Status
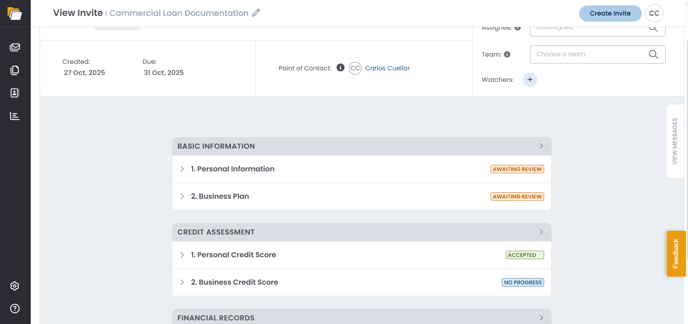
Once you open the Invite, you'll see the status of each document request within Request Groups:
- Awaiting Review: Documents have been uploaded and are waiting for your review
- Accepted: Documents have been reviewed and approved
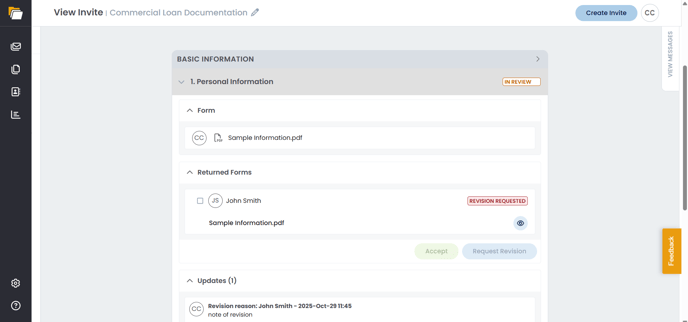
- In Review: Documents are currently being reviewed
- Revision Requested: You've requested changes to the uploaded documents
- No Progress: No documents have been uploaded yet
Preview and Download Individual Files
To preview files:
- Expand the Request Group containing the document
- Locate the uploaded file in the Returned Forms section
- Click the eye icon next to the file name
- The document will open in a preview window where you can review its contents

Preview availability depends on file type. PDFs, images, and common document formats typically support preview.
To download individual files:
- While in the preview window, click the download icon in the top-right corner
- The file will download to your device in its original format
Accept or Request Revision
After reviewing the uploaded documents, you can take action:
To accept documents:
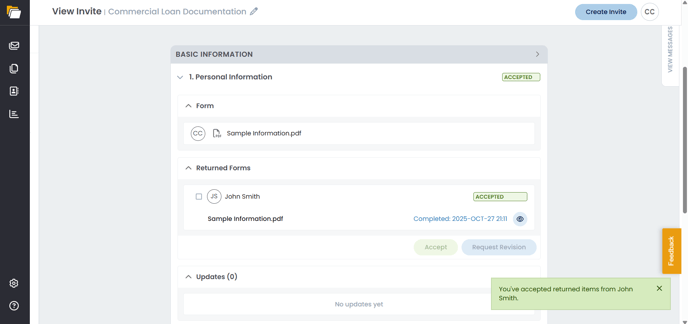
- Select the checkbox next to the contact's name in the Returned Files/Forms section
- Click the Accept button
- The document status will update to Accepted
- A confirmation message will appear at the bottom of the screen
To request revision:
- Select the checkbox next to the contact's name in the Returned Forms section
- Click the Request Revision button
- A dialog box will appear asking if you want to leave a note for your contact
- Check Leave a note for your contact(s) to provide specific feedback
- Enter your revision instructions in the text field
- Click Revision With Note (or Revision Without Note if you prefer not to include a message)
- The document status will update to Revision Requested and your contact will be notified
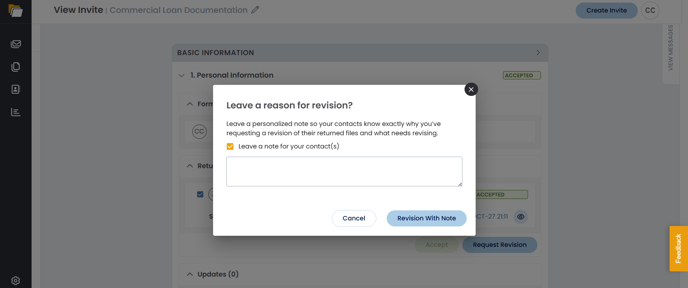
When you request a revision, the document returns to In Review status and your client will receive a notification with your feedback (if provided). The Updates section will display a log of the revision request with timestamp.
Download All Files
To download all files from the Invite at once:
- Click the Invite Actions dropdown in the top-right corner of the Invite
- Select Download Files
- All uploaded documents will be downloaded as a ZIP folder containing both original files and PDF copies
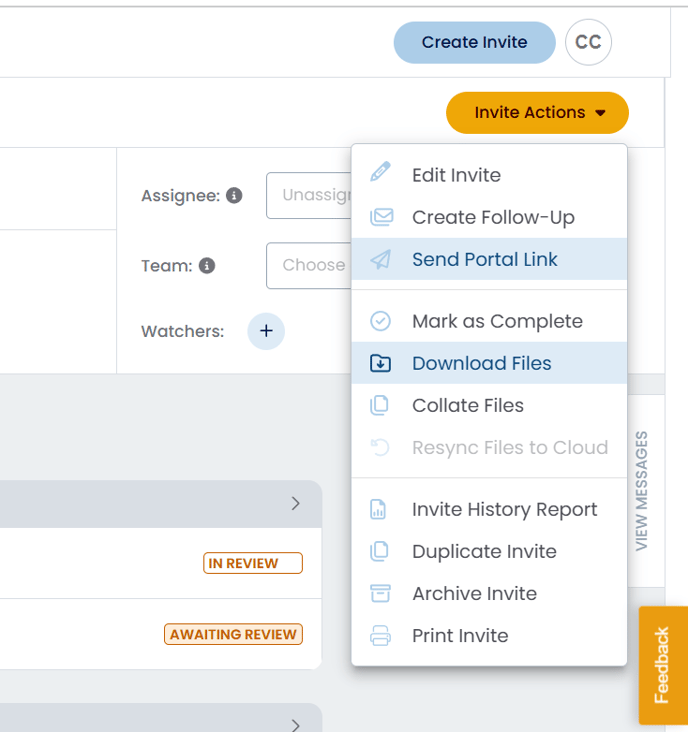
For detailed instructions on downloading files, see our article: Download All Uploaded Files as a ZIP
Collate Files
The Collate Files feature allows you to combine multiple documents into a single PDF:
- Click the Invite Actions dropdown
- Select Collate Files
- Choose which files to include in the collated PDF
- The system will generate a single merged document
This is particularly useful when you need to create a complete document package for review or archival purposes.
Managing the Invite
You can perform additional actions on the Invite through the Invite Actions dropdown:
- Edit Invite: Modify Invite details, add requests, or update settings
- Create Follow-Up: Send additional document requests to the same contact
- Send Portal Link: Resend access to the Client Portal
- Mark as Complete: Close the Invite when all documents are received and accepted
- Invite History Report: View a detailed activity log
- Duplicate Invite: Create a copy for similar document collections
- Archive Invite: Move completed Invites out of your active list
- Print Invite: Generate a printable version of the Invite
You can also update the Assignee, Team, and Watchers directly from the Invite header to manage notifications and workflow assignments.
Best Practices
💡 Review documents promptly: Timely reviews keep the collection process moving and improve client experience
💡 Provide specific feedback: When requesting revisions, include clear instructions about what needs to be corrected
💡 Use Accept selectively: Only accept documents that fully meet your requirements to maintain quality standards
💡 Download regularly: Save copies of accepted documents to your local system or cloud storage for backup
🎉 Success! You now have all the tools to efficiently review and manage documents uploaded by your clients! 🎉

