If you're having trouble with LiveForms, be sure to check out our LiveForm Troubleshooting Guide for step-by-step solutions and helpful tips.
FileInvite provides several options for contacts to complete forms online.
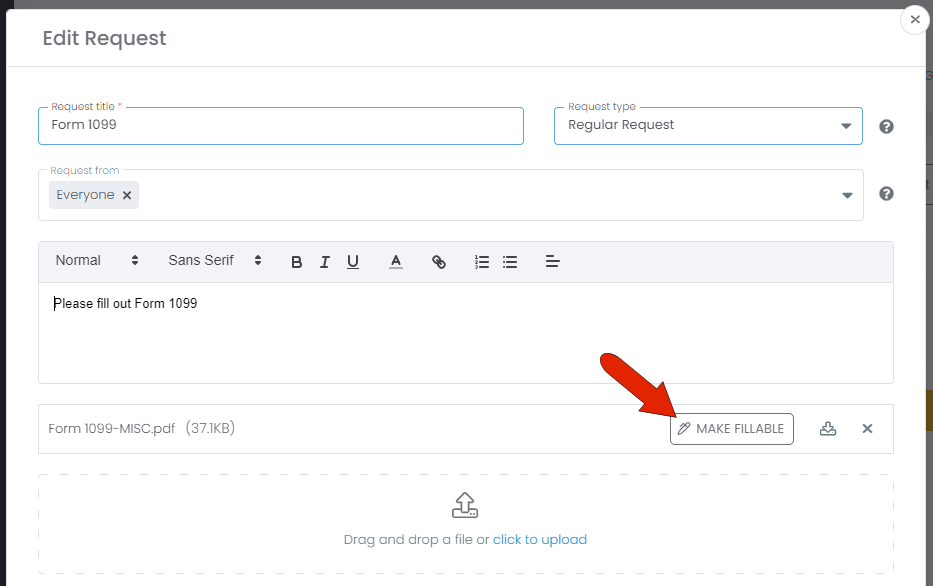
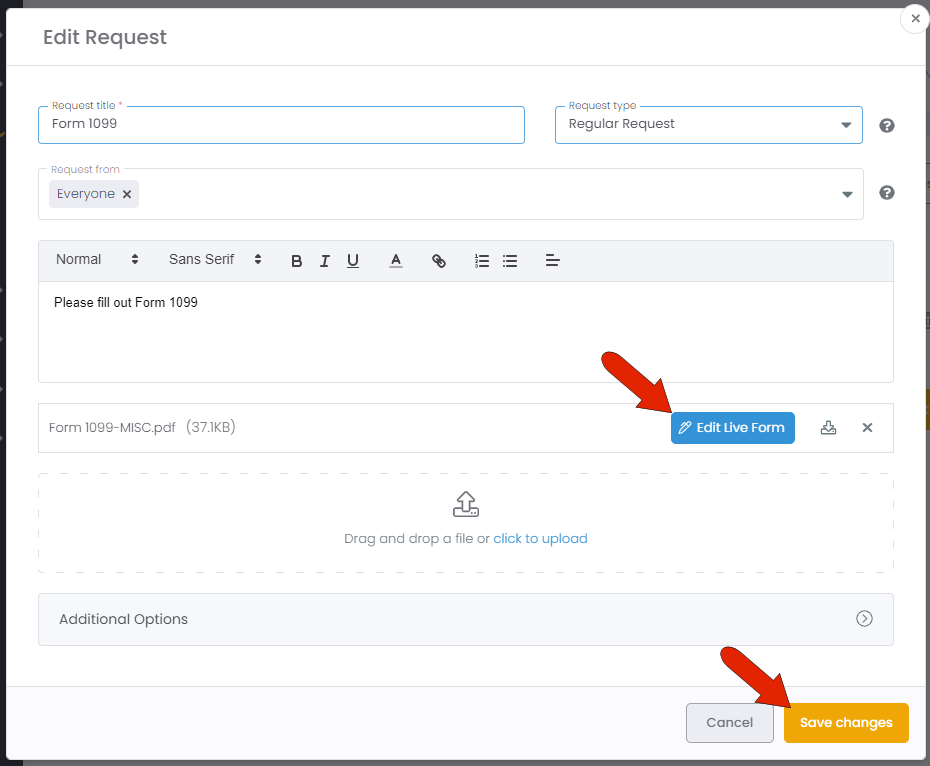
When creating a request, after uploading the document, click Make Fillable.
Important: Ensure the PDF you are uploading does not already contain fillable fields (e.g., created in Adobe Acrobat or another PDF editor), as this may result in an error. Please use a flat, non-fillable version of the PDF. You can flatten it by printing the file to PDF. If you'd like to keep the file as is, set the request type to Regular instead. Guide: How to Prepare a File for a Live Form
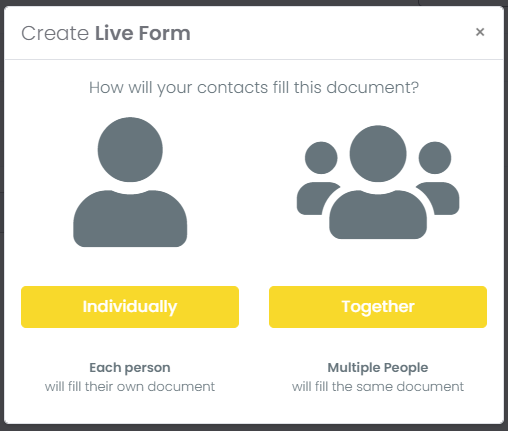
Choose whether the form must be completed separately by each contact, or whether contacts can collaborate on the same form.
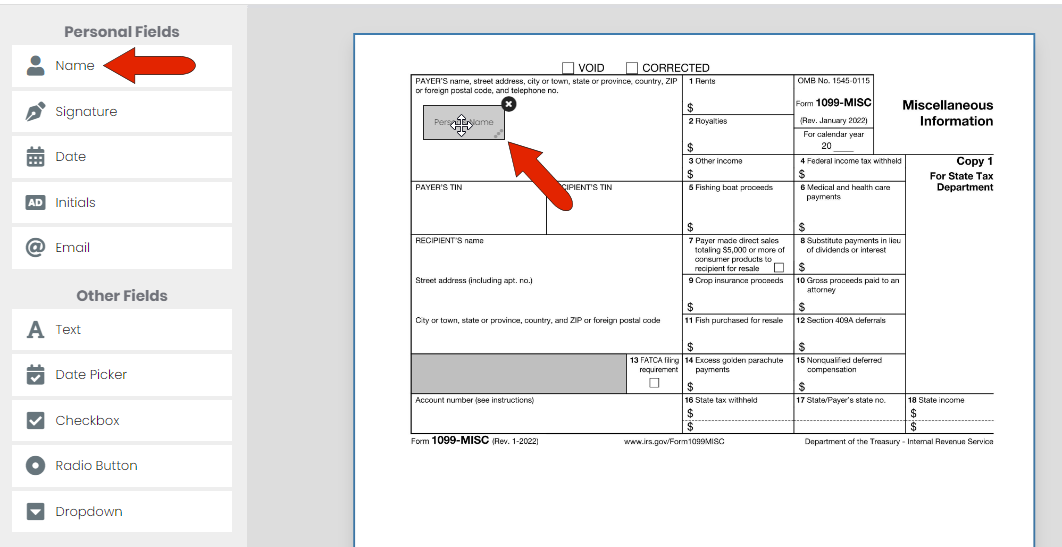
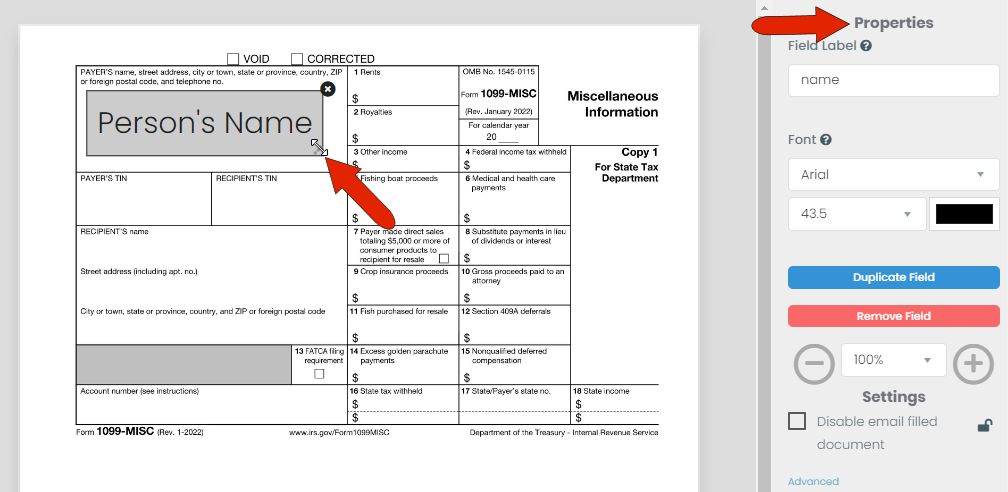
A preview of the blank form appears, with a list of Personal Fields and Other Fields along the left. Each of these fields can be dragged directly onto the blank form where needed. For example, drag the Name field into the space on the form that asks for a name.
Note: For forms with the Together option, which can be submitted by multiple people working together, you can choose each contact to whom Personal Fields will be assigned.
When creating a LiveForm, we recommend saving your progress often to avoid losing work.
Sessions may expire or time out if the page has been idle for too long, which can result in loss of unsaved changes.
Each inserted field can be resized by dragging its lower right corner. For any selected field, the Properties pane on the right has additional formatting options.
The Personal Fields also include Signature, Date (which will fill in the current date), Initials, and Email.
Under Other Fields are more options, including Text which can include numbers, Date Picker which invokes a calendar, and Checkbox for yes/no answers.

When a text box is duplicated, ensure it is under 100% view to prevent the box font size from increasing automatically to the size of the view
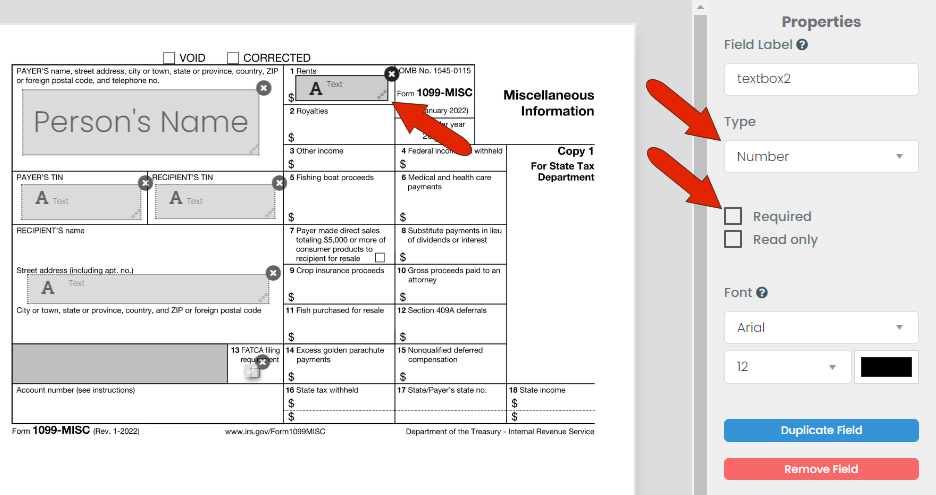
Many fillable fields need to accept numbers. This can be done for a Text field, by going to the Properties on the right and changing its Type. There are also options to make a field Required or Read only.
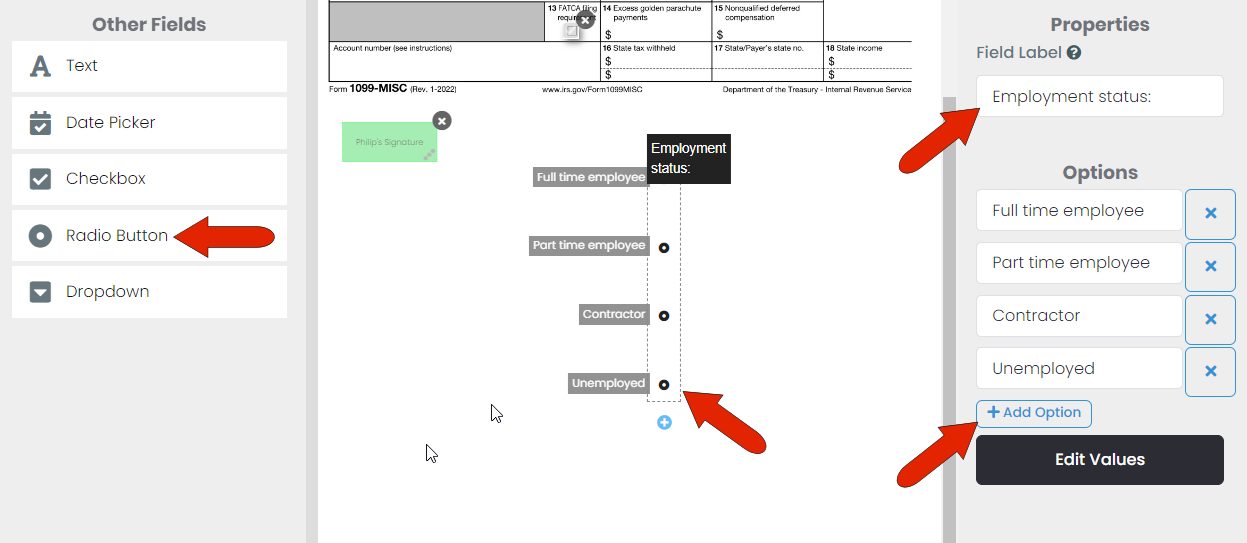
The Radio Button and Dropdown options enable you to create fields in which contacts can select from a list of options. The Field Label and Options can be set in the pane on the right.
To see how the added fields will look from the contact’s perspective, click Preview at the lower right.
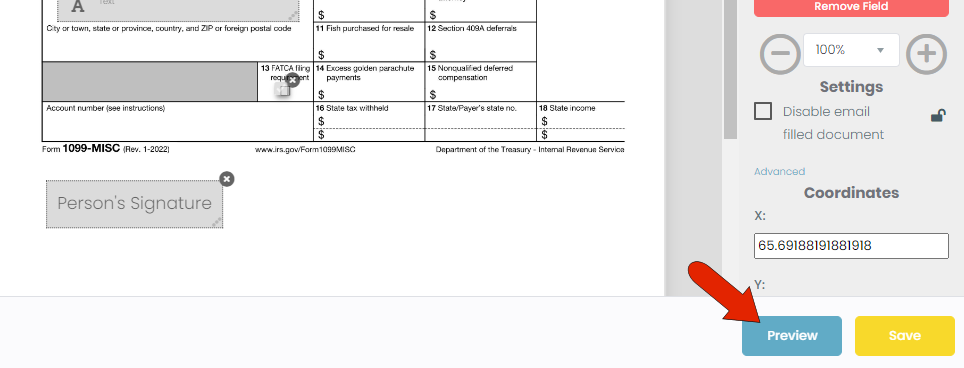
In the preview, each field is indicated by a gray box. You can click inside a box to test it out.
When finished, close the preview and save the form. This brings you back to the Edit Request window, where there is an Edit Live Form button if you need to make changes. When the form is ready, click Save Changes.
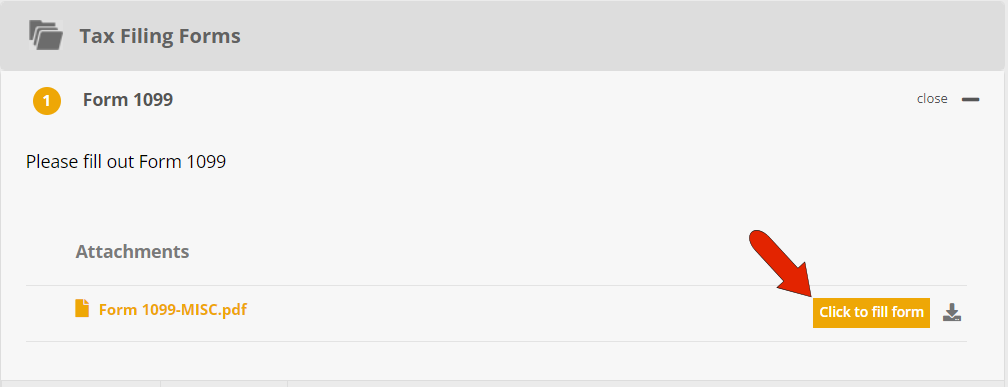
On the client side, when they receive their Invite and access the request in their Client Portal, they will see a button to Click to fill form.