Request names, dates, and e-signatures directly in your documents
If you're having trouble with LiveForms, be sure to check out our LiveForm Troubleshooting Guide for step-by-step solutions and helpful tips.
When creating a new FileInvite, you can request that documents be signed by your client. These signatures are digitally certified and legally binding.
Adding e-signatures are available on the Pro and Multi plans. Find out more about the different FileInvite plans.

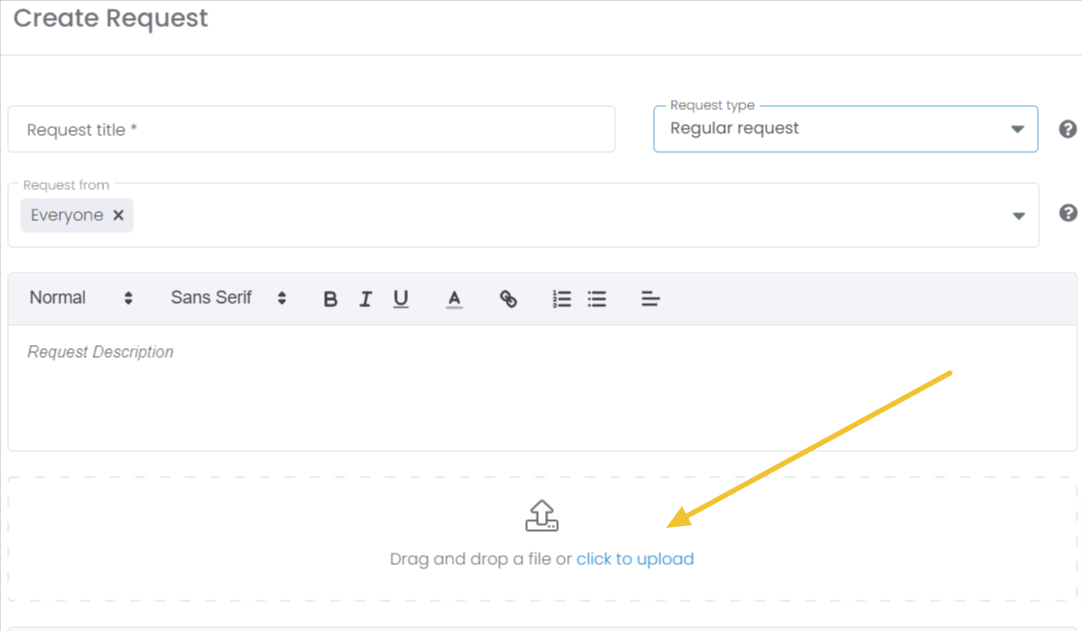
1. In the FileInvite app, click Create New Invite.

2. Create a request and upload the document you want to be signed.
Tip: Save time creating file requests by loading an invite template.
3. Click the Make Fillable button to add a signature request.

4. To open the signature editor, select Single when prompted.

5. Select the information you would like to request, then click and drag the fields to your desired position on the document.
Tip: You can place as many fields as desired, multiple times.
You can also click and drag the bottom right-hand corner of a field to resize it.
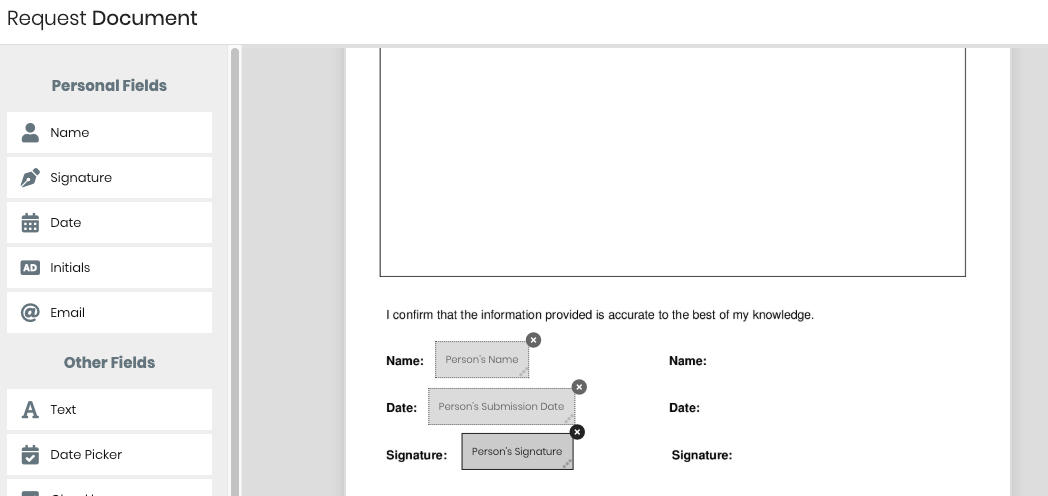
6. Click Save to confirm changes.
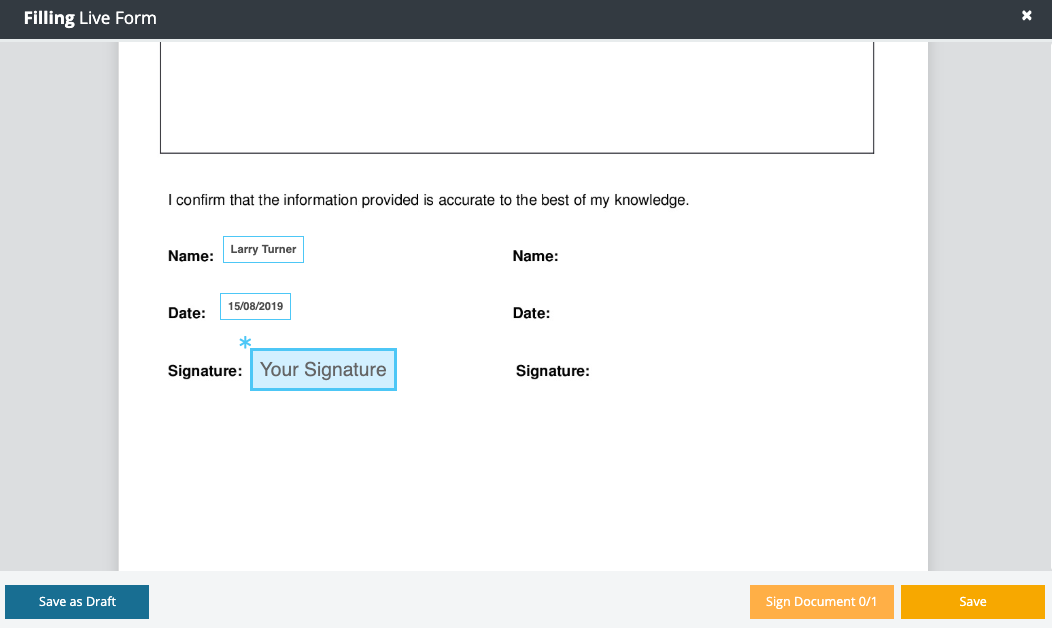
Your document will now read Edit live form, which means is ready for clients to sign.


Your client's experience
In the Client Portal, your client will be able to see which documents require signatures.
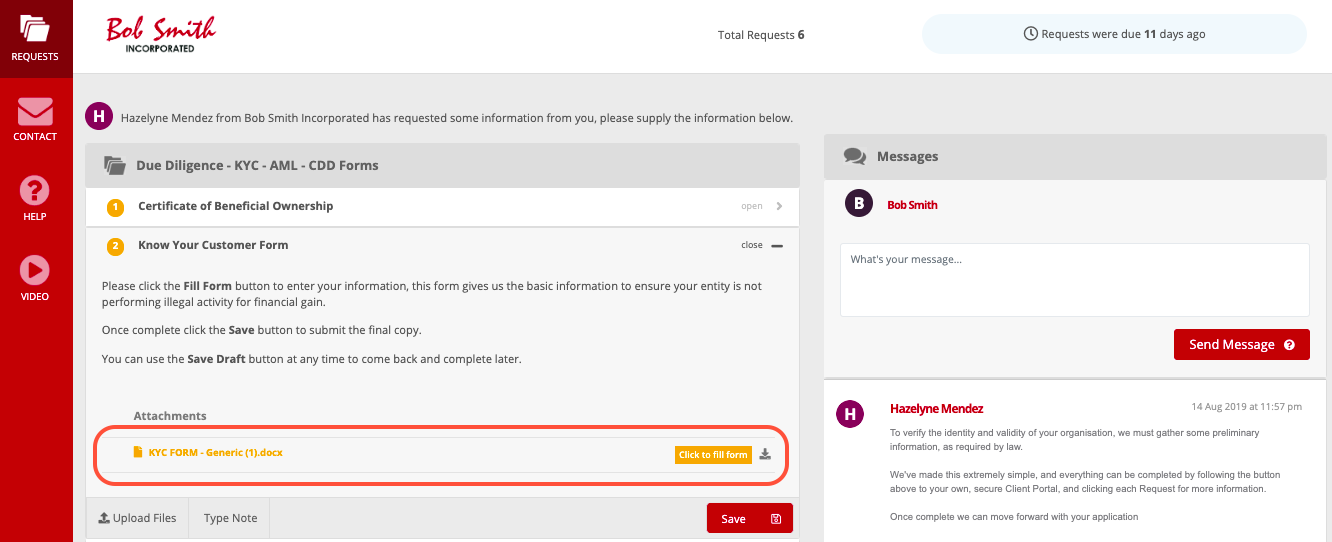
They simply need to click either the Sign Here button, or click the Signature Placeholder for each signature area required.
They will be able to sign by:
-
Drawing their signature
-
Typing their name
-
Uploading an image of their signature
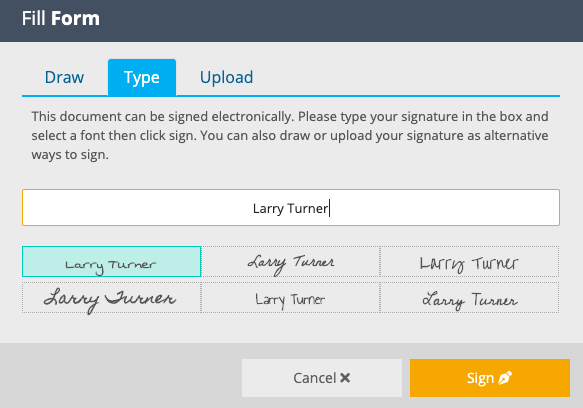
Once they click Sign, the client will notified that this is a legally binding document.
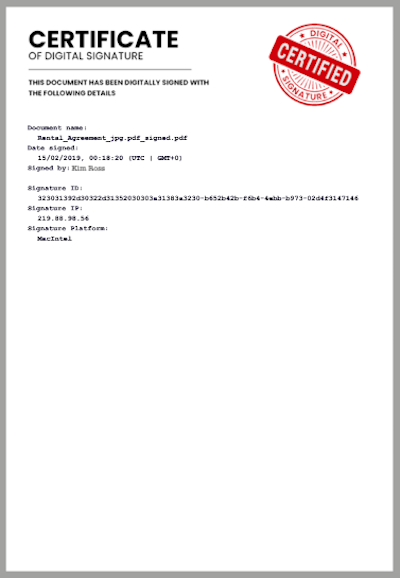
Note: Your clients will receive a copy of any document they sign, along with a certificate of digital signature, which you can also review.