
In this guide, we'll show you how to set up a request so multiple Contacts can work on an Invite.
Note: When adding Requests to an Invite with Multiple Parties you can control:
Who is assigned a Request
-
Whether each person needs to complete a request or whether it can be done by a single party.
-
Whether everyone can see the information submitted to a request.
Note: Each party will receive their own Client Portal to access and complete the Invite and can only work on Requests assigned to them.

In the FileInvite app, click Create New Invite.
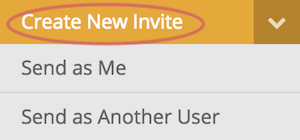
-
Select Send as Me to send the invite as yourself.
-
Select Send as Another User to send the invite on behalf of another one of your team.
Choosing to Create Blank Invite will take you to the setup screen.
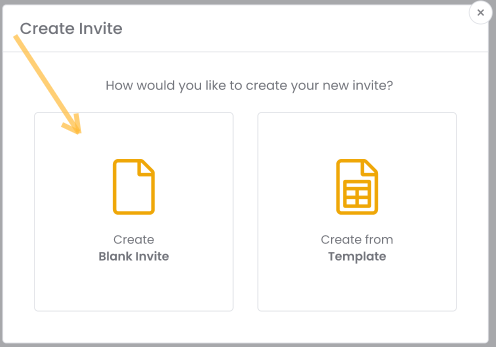
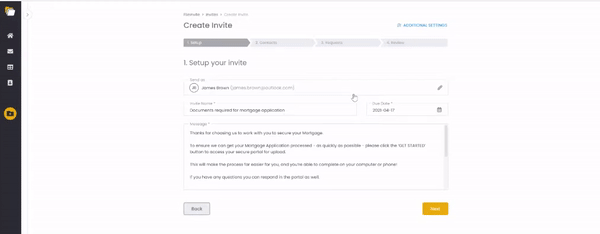
Start by choosing Send as Me or Send as {Another user}, and choose Create Blank Invite option. This will take you to the invite setup screen. This is where you can add basic information about the invite, like the subject and a description or message to your clients to identify what the invite is about.
-
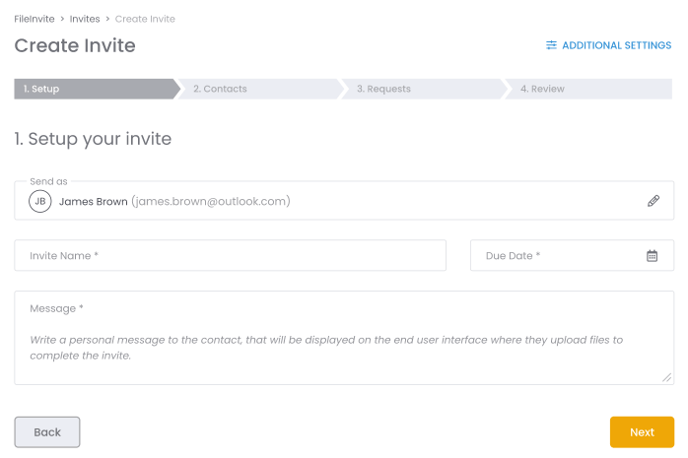
Add a subject line to your invite.
-
Add a message to accompany your Invite.
-
Set a due date for your invite.
Note: The due date must be at least one day later than the creation date.
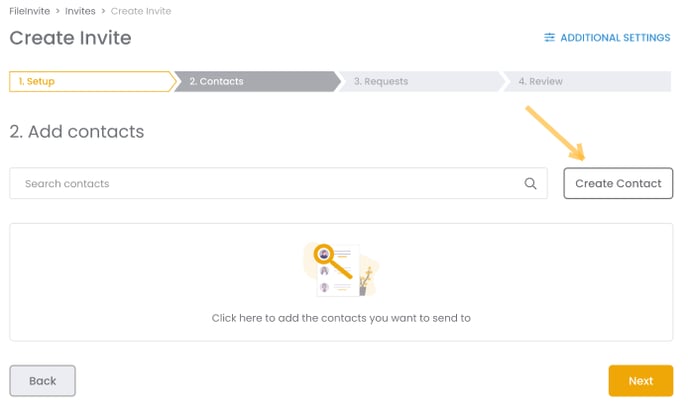
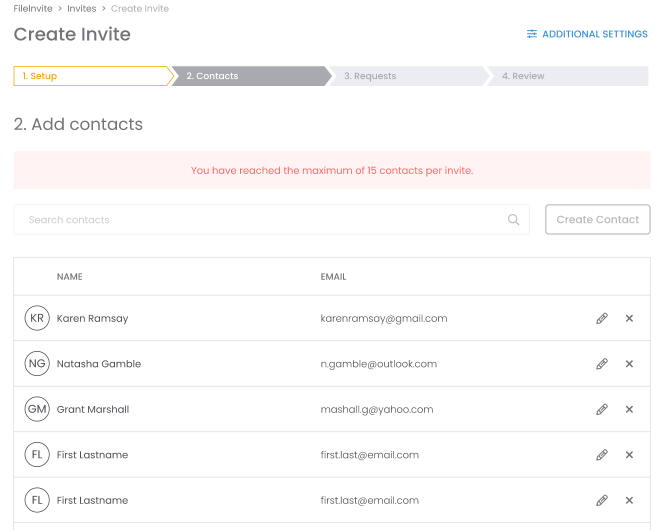
Note: You can add up to 15 contacts in one invite.
You can also find additional options over the top which let you configure additional settings like:
-
Cloud storage sync - You can sync your cloud storage here to automatically backup any documents.
-
Reminders - Set how often your client gets reminder notifications about the invite.
-
Password protected - For added security, enabling this option lets your client set a password to log in to the portal, and would have to use that password to access the portal from then on.
-
Reference ID - Reference number for the invite for additional documentation.
-
Display user override - This option would override the invite owner and let you choose who would appear as the sender of the invite to your clients.
-
Notification user override - This option would override the invite owner and let you choose who would get notified of any invite activities.
Note: Each Users account will be connected to a different Cloud Drive, so when integrating Cloud Platforms ensure each User has the Drive Setup and Connected.
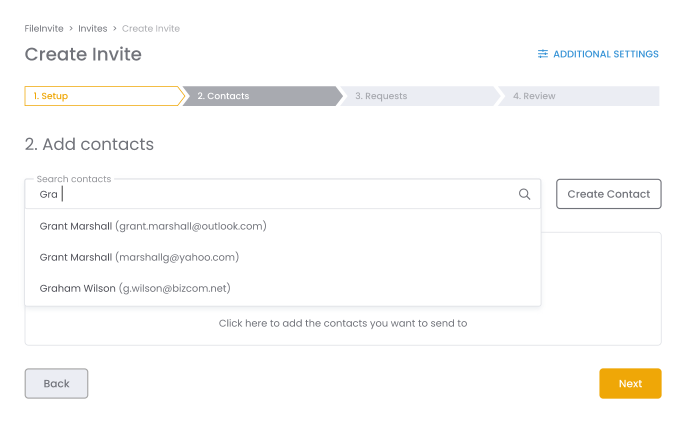
You must have at least one contact assigned to an Invite to be able to add requests.
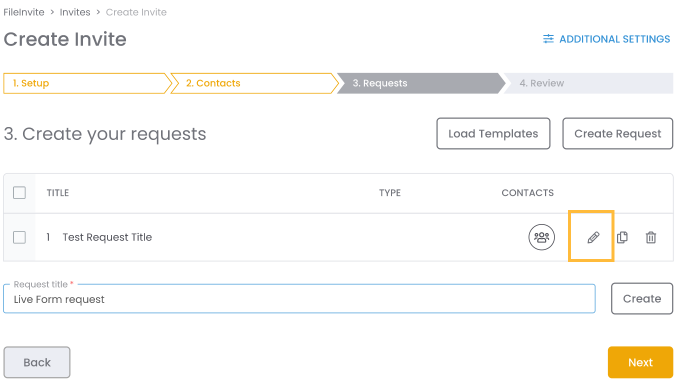
Click the Edit Pencil ✎ to edit the Request - who the request should be assigned to, who needs to action the request, as well as who can see the information submitted to a request and add any extra attachments or add signatures with our native signature integration.
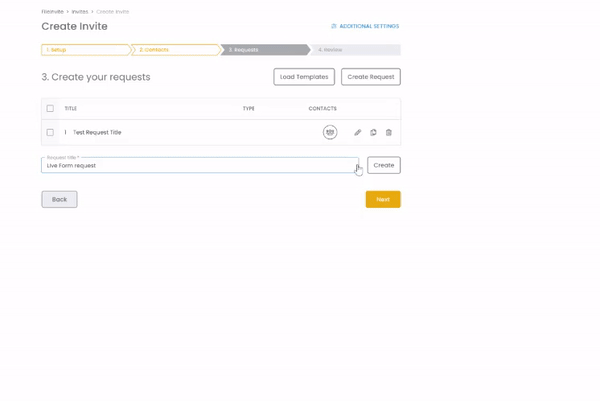
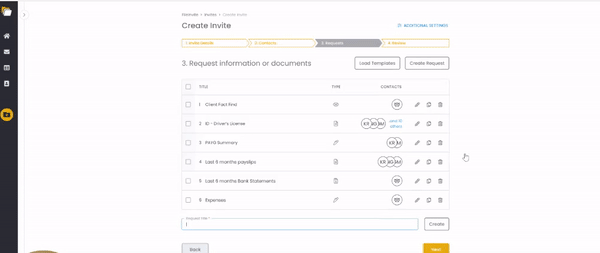
Add as many Requests with live forms as you like and assign contacts to the requests.
Reorganize requests by clicking the far left tab of the Request and dragging it around.
Review requests by contact by selecting the relevant Contacts Name from the Requests Assignment Tabs.
Once you have all the information and requests set for the invite, you may review the invite and send it.
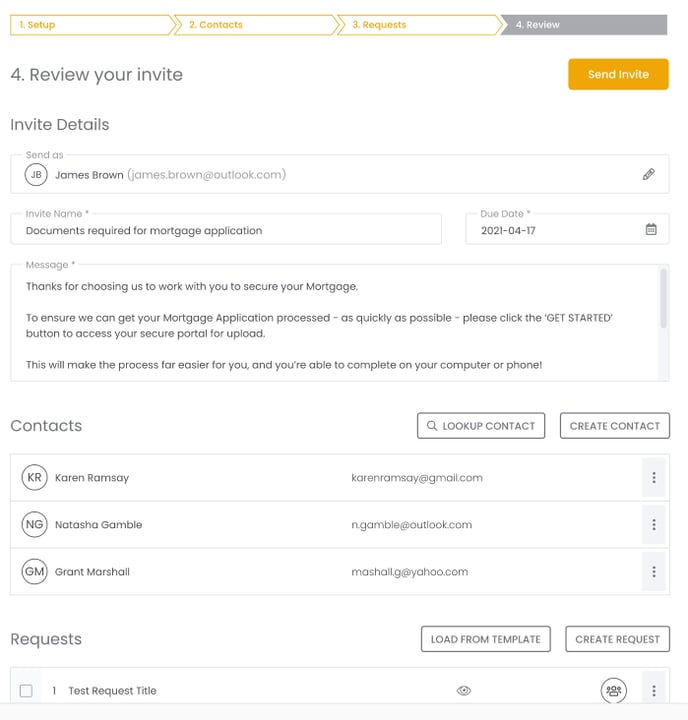
You can now relax and wait for your clients to start working on the invite.

You can review and monitor the Invites progress by clicking Review your Invite.