Creating and Sending an Invite
In this article, we'll walk through the process of sending and tracking your first Invite using FileInvite's latest features.
Overview
- Create the Invite
- Configure the Invite and Contacts
- Set Assignment and Teams (New Feature)
- Send the Invite
Step 1: Create the Invite
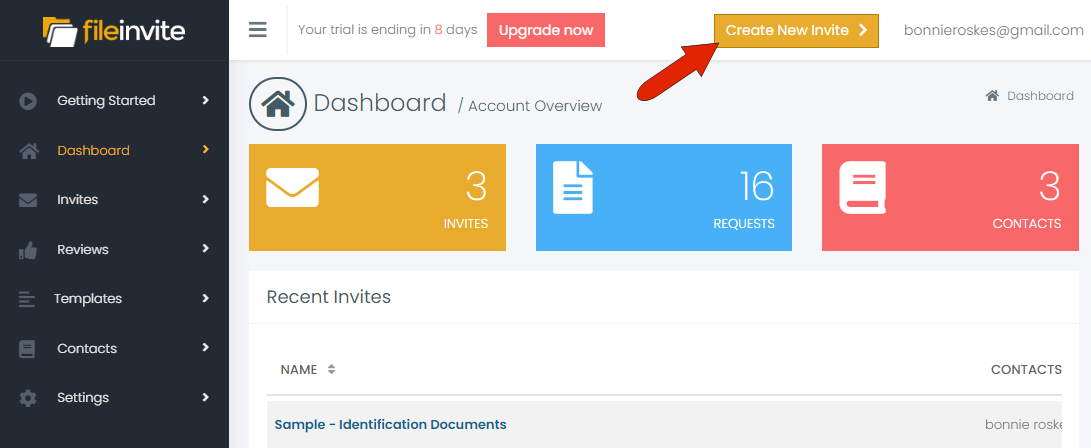
Go to your account Dashboard and click Create a New Invite at the top right.
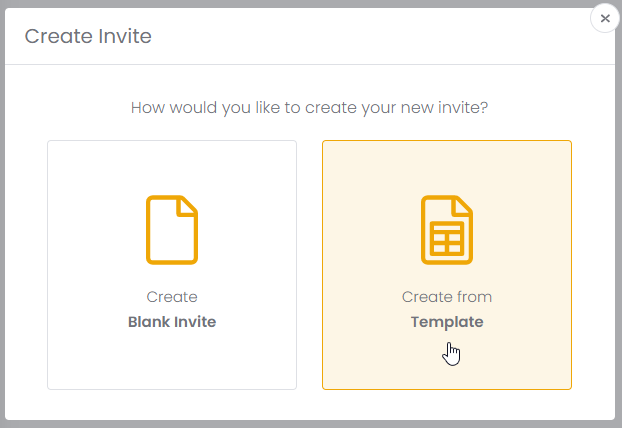
There are two options: Create a Blank Invite in which the entire Invite is created from scratch, and Create from Template which already includes messages and requested documents. For this example, we will use one of the templates included with FileInvite, so click Create from Template.
In the Load Templates window click the FileInvite folder in the left column. This will display the templates provided by FileInvite. The templates in this folder are listed in the middle column, each with a set of files that comprise the request.
Click the Add icon for the template you want to use, which moves the selected template to the Selected Templates column on the right.
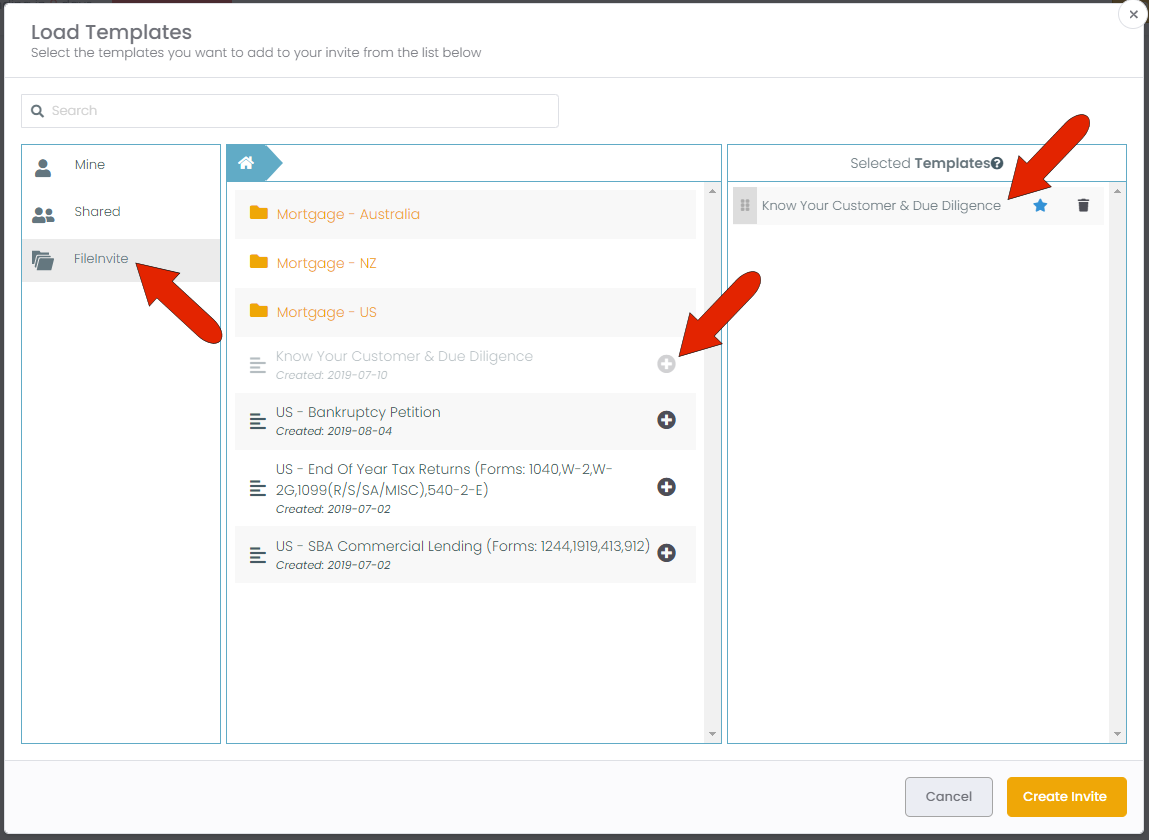
Note: You can select more than one template for an Invite.
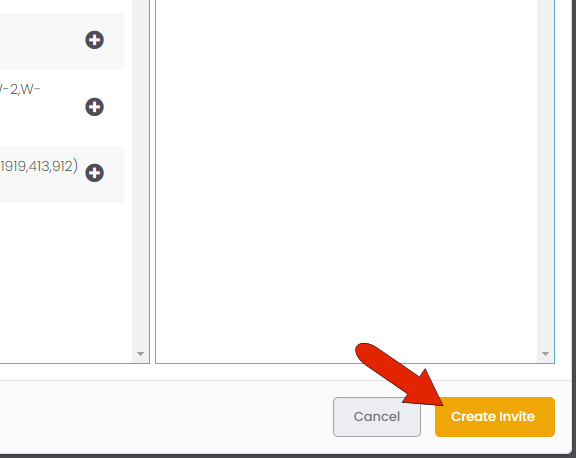
Click Create Invite at the bottom of this window.
Step 2: Configure the Invite Details
🆕 New Dynamic Invite Name Feature
FileInvite now includes a dedicated Invite Name field that separates your internal identification from what borrowers see. This allows you to easily associate invites with specific loans or companies without affecting the borrower experience.
- Invite Name: This is for your internal identification and appears in your dashboard and invite lists
- Email Subject: This is what the borrower sees in their email notification
When you select a template, the Invite Name automatically populates with the template name, but you can customize it as needed.
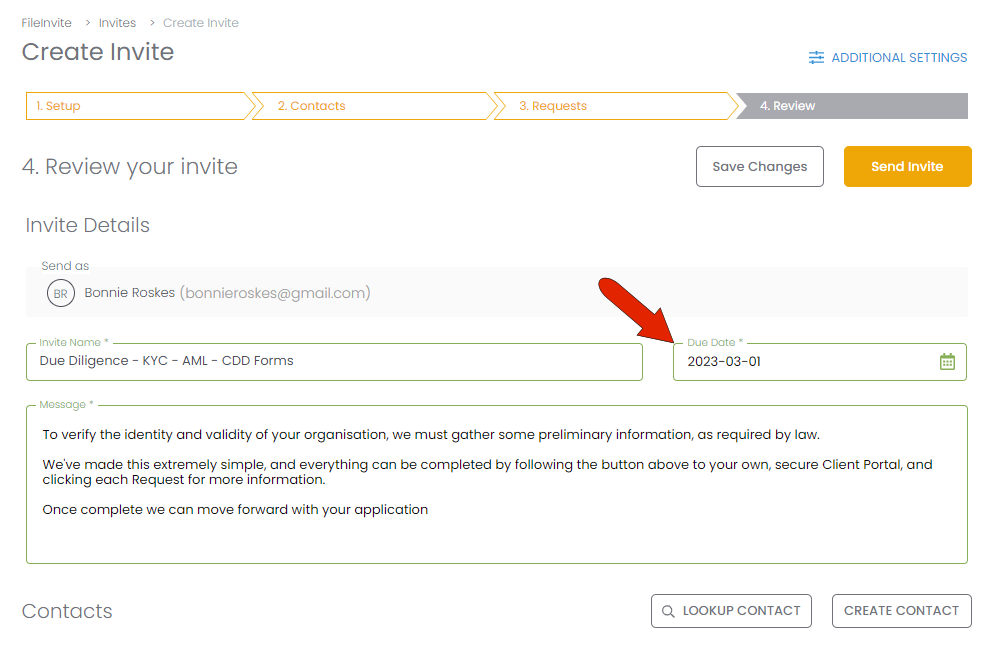
Configure Basic Details
- Enter your Invite Name (for internal identification)
- Set the Due Date by which you want the request returned
- Customize the email message to make the Invite more personal
🆕 Assignment Fields in Create Header
You can now optionally assign Assignee, Team, and Watchers directly during invite creation, streamlining your workflow by eliminating additional steps after the invite is created.
New Assignment Options:
- Assignee: Select the team member responsible for this invite
- Team: Assign the invite to a specific team
- Watchers: Add team members who should receive notifications about this invite's progress
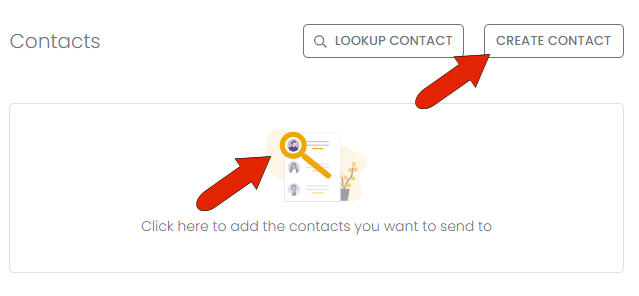
Step 3: Configure Contacts
Go to the Contacts section, located below the Invite Details section, and add the contact who will receive the Invite. If this is your first Invite, you probably have not yet added contacts to your account, so either click Create Contact or click in the large Create Contact box.
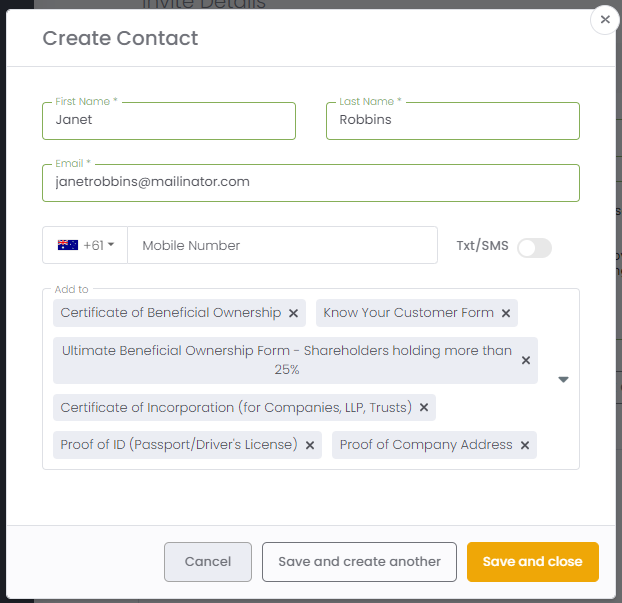
In the Create Contact window, enter the contact's:
- First name
- Last name
- Email address
- Mobile number (optional, for SMS notifications - enter with no spaces or dashes)
- Enable the Text/SMS slider if you want SMS notifications
The Add to field contains a list of all requested documents that this contact needs to complete.
Click Save and Close once you have finished updating the Contacts section.
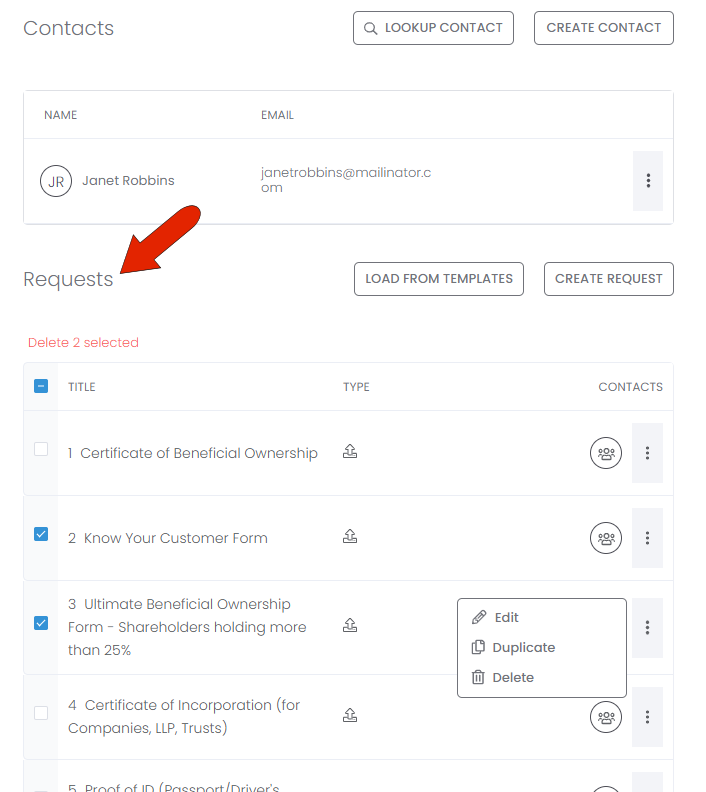
Step 4: Configure Requests
Scroll to the Requests section below the Contacts section. The documents listed here are those included in the selected Invite template.
🆕 Enhanced Message Features
You can now include clickable hyperlinks in your request messages:
- Add HTTPS links that will be clickable for borrowers
- Use the built-in hyperlink editor for easy formatting
- Links are validated for security and will open in new tabs
- Protection against malicious URLs using Google's Safe Browsing API
🆕 Duplicate Group Request Feature
When working with similar document sets, you can now duplicate entire request groups:
- Click the three-dot menu on any request group
- Select Duplicate Group to copy the entire structure
- The duplicated group retains original request structure, messages, and assigned contacts
- "Copy" is automatically appended to the group name for easy identification
Managing Requests
- To delete documents: check their box and click the Delete link above the table
- Click the three-dot icon for a document to access options: Edit, Duplicate, or Delete
- Use Duplicate Group for complex lending scenarios with multiple entities
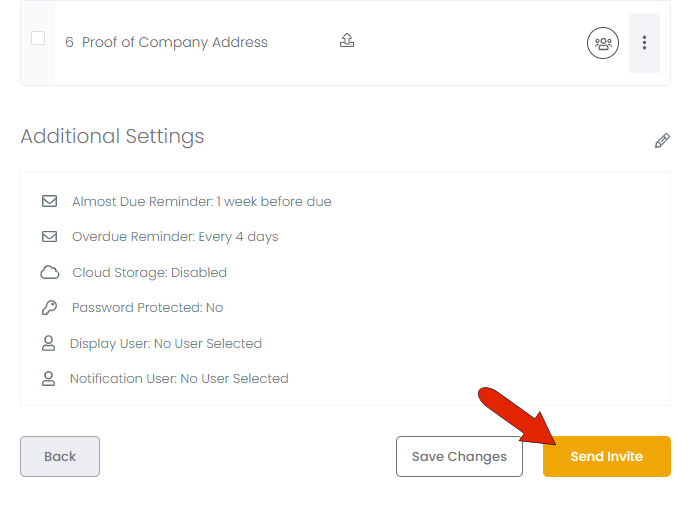
Step 5: Send the Invite
Once the Invite contact, contents, and assignments are defined, the Invite is ready to send.
Click Send Invite, which is below the Additional Settings section.
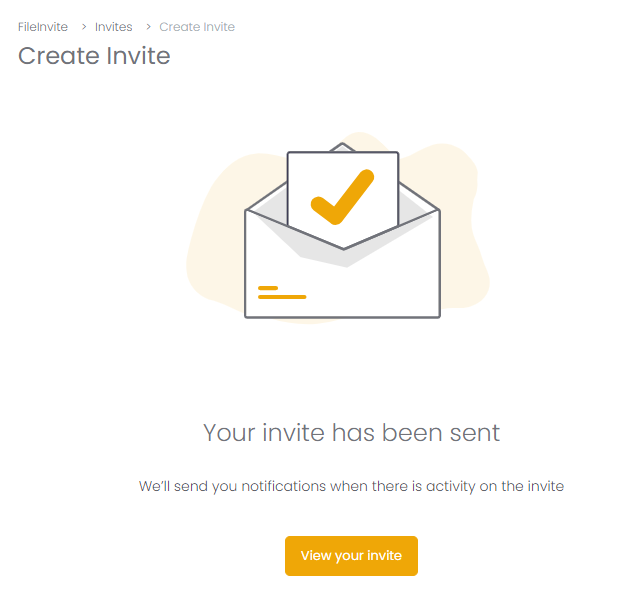
After sending the invite, you'll see a success message, with a button to View your Invite.
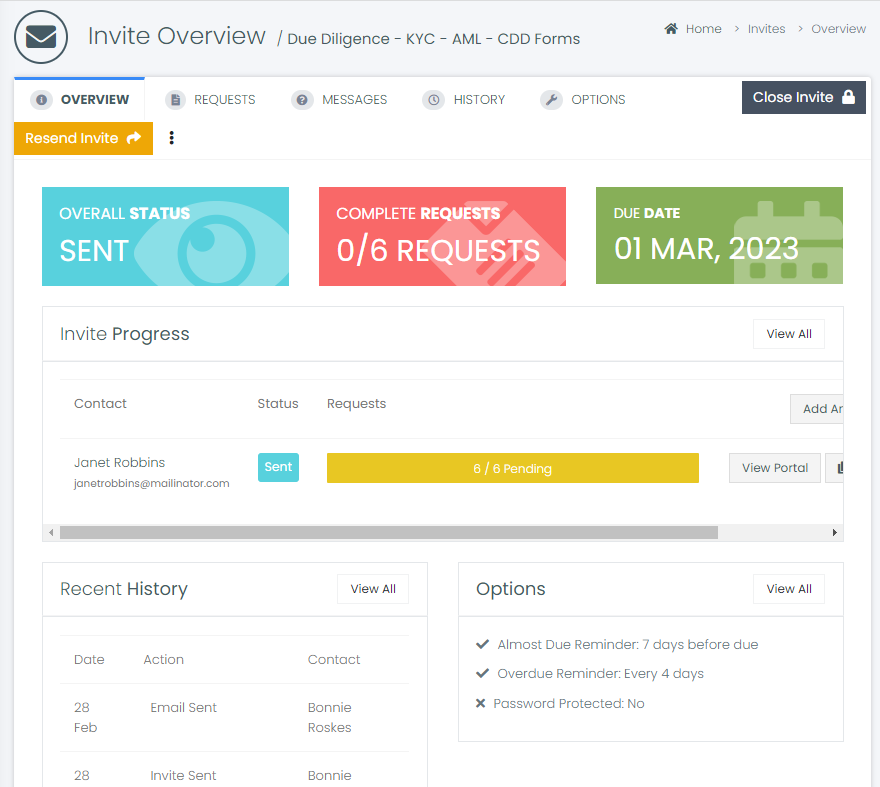
Step 6: Track Your Invite
Click the View your Invite button to go to the Invite Overview page. This page displays the Invite's status, completed requests, due date, history, and other details.
🆕 Enhanced Features Available:
- Print Invite: Generate a PDF summary with contacts, requests, descriptions, and due dates
- Remove Watchers: Manage who receives notifications by removing watchers as needed
- Mark as Complete: Manually override invite status without accepting all requests
Open your Invites list to see where your sent Invite appears. This list includes all Invites both sent and unsent, and displays your custom Invite Names for easy identification.

What's New in This Process
🆕 Recent Enhancements
- Dynamic Invite Name: Separate internal identification from borrower-facing communication
- Assignment During Creation: Set Assignee, Team, and Watchers directly in the create flow
- Hyperlinks in Messages: Include clickable, secure links in invite and request messages
- Duplicate Group Requests: Copy entire request groups for similar document sets
- Enhanced Character Limit: Message character limit increased from 255 to 500 characters
- Improved UX: Better toast messages, clearer due date selection, and improved download experience
These improvements streamline your workflow and provide better control over invite management while maintaining security and user experience for your borrowers.