If you're having trouble with Invites, be sure to check out our Invite Troubleshooting Guide for step-by-step solutions and helpful tips.
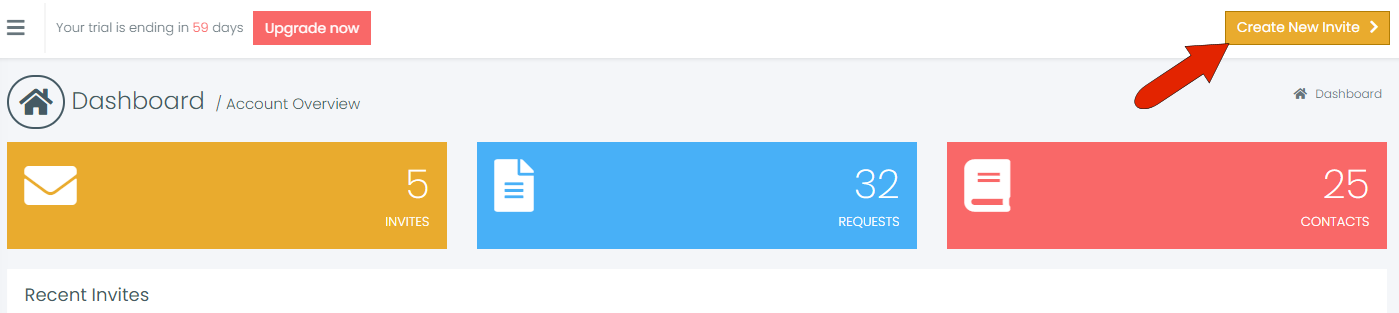
To get started, click Create New Invite, which is found at the top right corner of any FileInvite page.
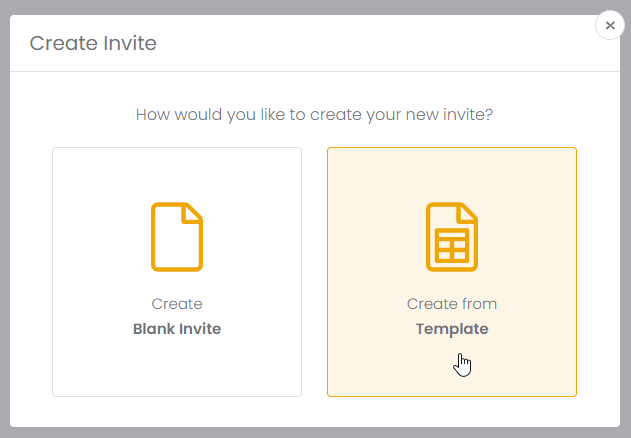
Choose the option Create from Template.
In the Load Templates window, choose the template folder along the left, which is Mine in this example. (Choosing the FileInvite folder will present several standard templates provided by FileInvite.)
All templates included in the folder are listed in the center of the window. Click the Add icon for one or more templates you want to include in your Invite, which moves that template to the Selected Templates section. Use the Delete icon to deselect a template. Then click Create Invite.

Note: If you load multiple templates simultaneously, the request order may not follow the sequence you intended. To preserve a specific order, load your first template and then use the Load From Templates button in the Requests section to add any additional templates one at a time, in your preferred order.
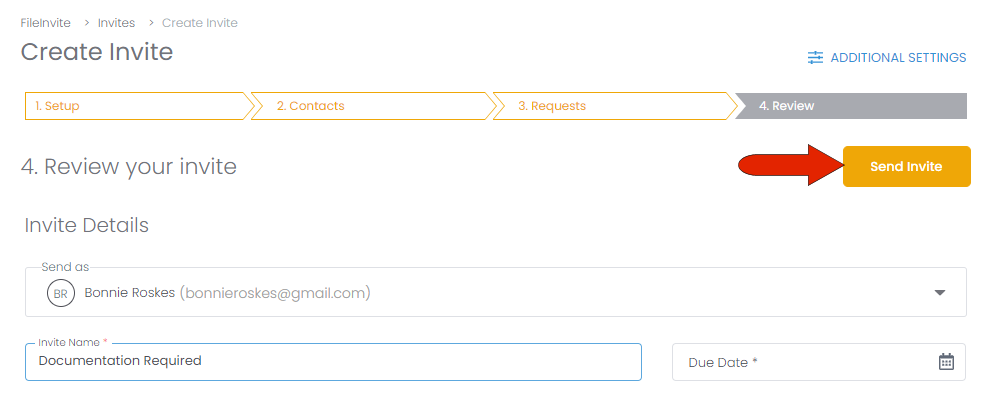
The Invite Details section displays the Invite Name and Message included with the template, both of which can be edited for this Invite if needed. You must also supply a Due Date, by which the documents must be returned. (Note that the due date must be at least one day later than the date you send the Invite.)
Note: By default, the email will come from you. But if you have team members in your account, you can send the Invite from another user. You can also transfer Invite ownership to another user after the Invite is sent.
Special characters such as !, #, $, ^, &, *, (), _, etc. are not supported in the invite title or body.
If you receive an error when sending the invite, please check for and remove any of these characters before trying again.
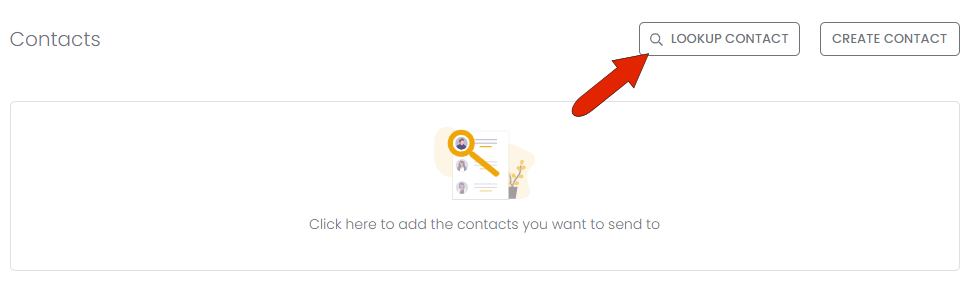
The next section on this page is Contacts. If you have already contacts in your Contacts list, click Lookup Contact.
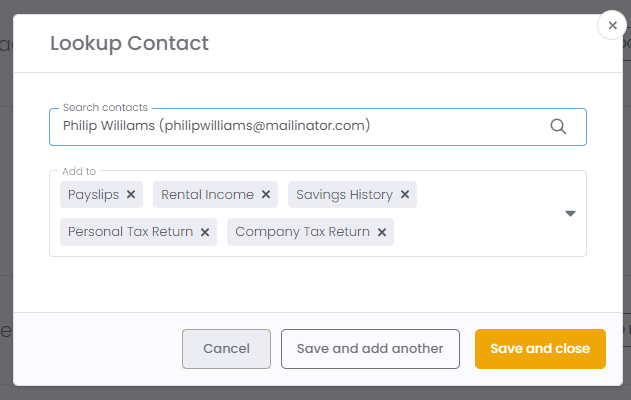
In the Lookup Contact window, enter any part of a contact name in the search field to find the contact. This window also lists all documents included in the template, and you can delete any documents that should not be sent to this contact.
To look up and add another contact, click Save and add another, otherwise click Save and close. Note that an Invite can include up to 15 contacts.
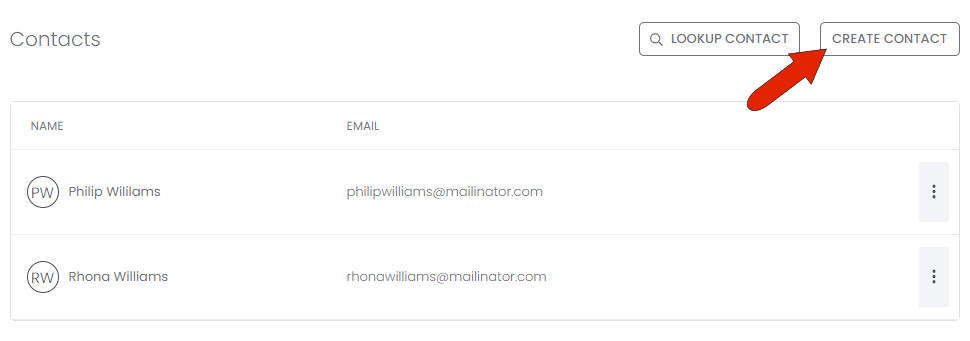
If you do not have contacts set up, or if you want to send the Invite to a recipient not yet in the Contacts list, click Create Contact.
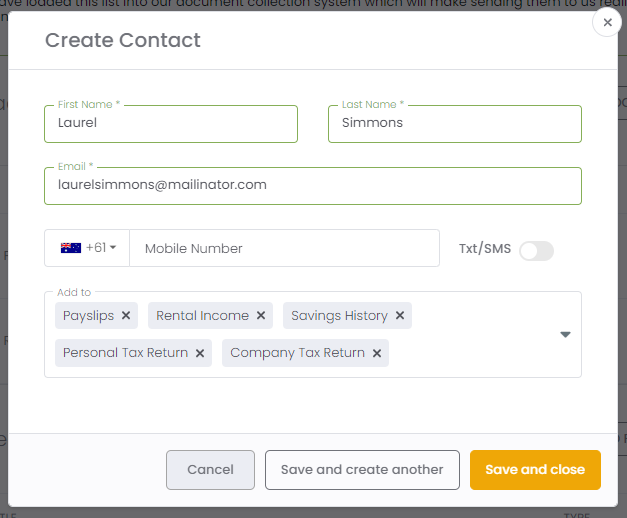
In the Create Contact window, enter the recipient’s first name, last name, and email address. If you want the recipient to also receive an SMS message about the Invite, enter their mobile number and enable the Text/SMS slider. In this window you can also delete any documents you don’t want sent to this contact. To add another contact, click Save and add another, otherwise click Save and close. Any new contacts will be added as Invite recipients, and added to the Contacts list as well.
The next section is Requests, which lists all documents included with the template. Any selected documents can be deleted, and each document is listed with its title, type, icon indicating whether it will be sent to all contacts or specific contacts, and a three-dot icon. Clicking this icon opens a menu with options to Edit, Duplicate, or Delete the document.
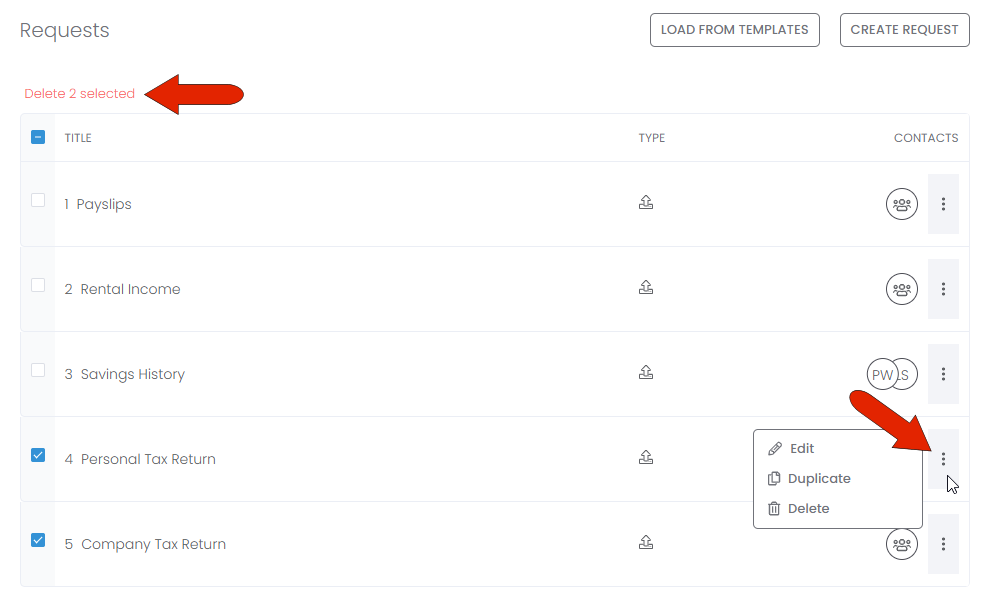
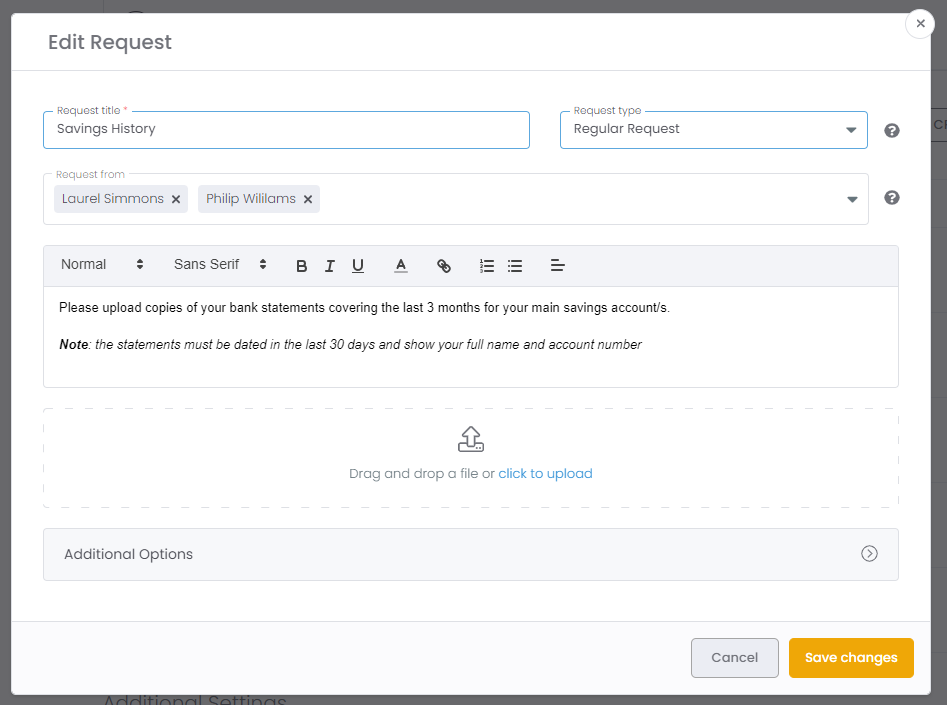
Editing a document opens the Edit Request window, where you can edit the request title, request type, choose specific contacts, or edit the request instructions. If you have the form you want the client to complete, you can upload the form here, and make it live so that the client can complete it online.
- If you're having trouble uploading a file, please try opening the file first to confirm it is not corrupted.
- There is a maximum upload limit of 1 GB for video files. Please ensure your file does not exceed this size before uploading.
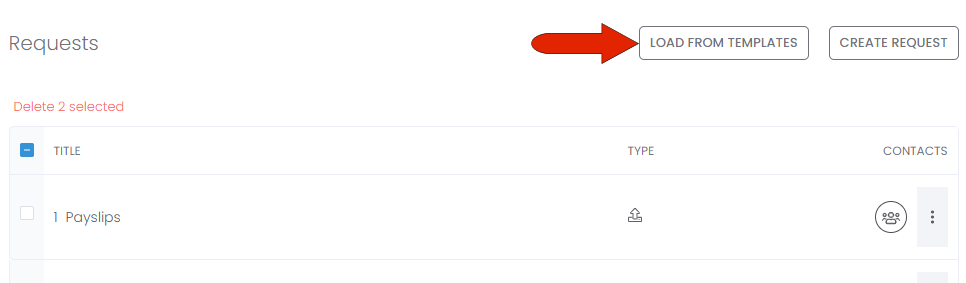
At the top of the Requests section are options to Load from Templates, to bring in additional documents from different templates, or Create Request to include a document from scratch.
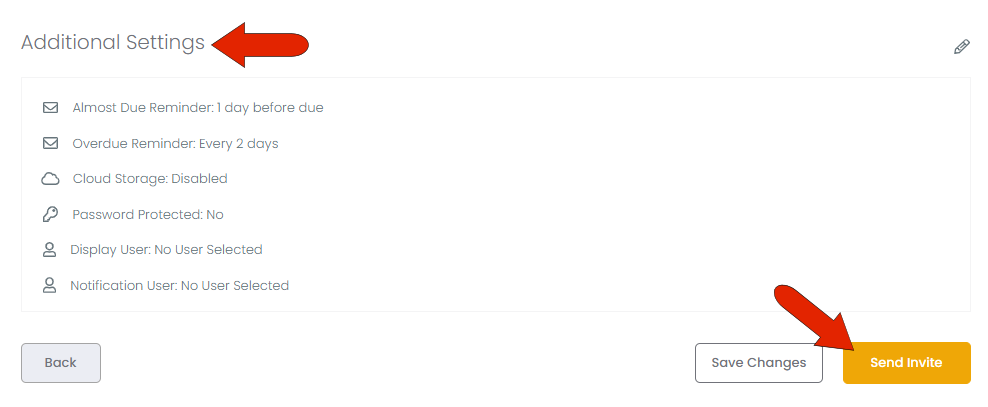
The last section is Additional Settings, which control settings such as reminders and overdue notices, password protection, and more. These settings can be changed by clicking the Edit icon. If the Invite is ready to send, click Send Invite.
Invite overdue reminders will automatically stop 14 days after the due date or when your client clicks “I’m Finished” in their Client Portal — whichever happens first.
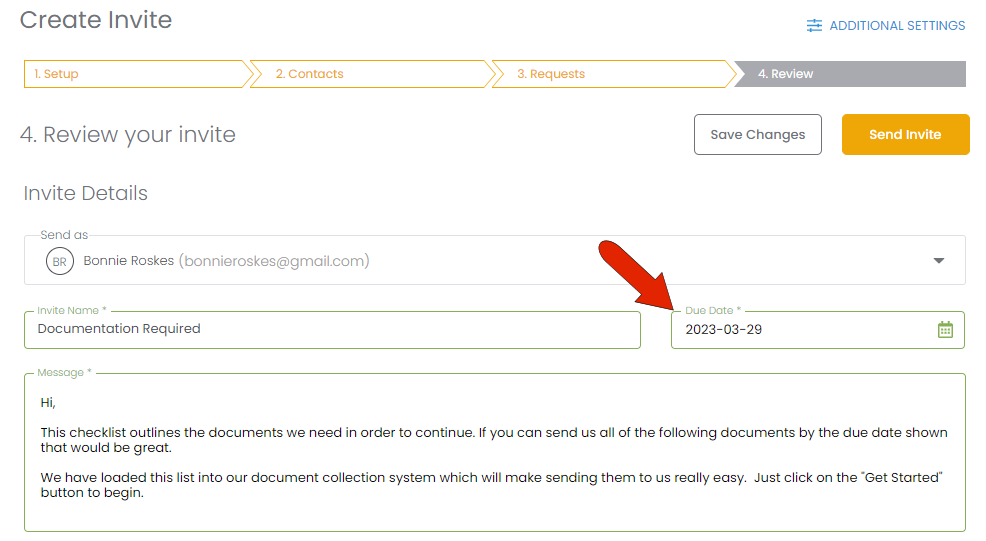
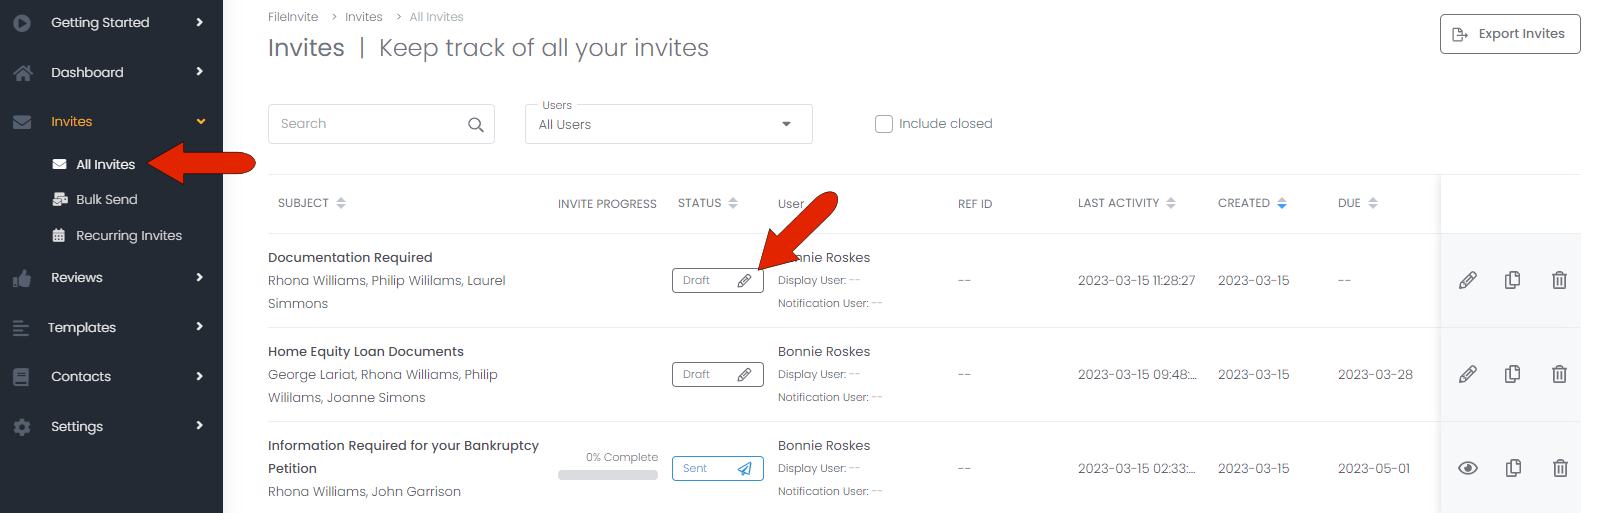
If you prefer to send the Invite later, don’t click Send Invite. You can find the Invite in your Invites list, listed with Draft status.
When the Invite is ready to send, click the Invite name to open it, which automatically takes you to the Review your invite step. From here you can make changes to this step or any previous step, then click Send Invite.