This guide will lay out some of the best practices that we have found from our customers. This will help ensure the Invites you send out are as easy and engaging as possible for your clients, so they get documents returned to you.

1. Prepare your Client
First off ensure you let your clients know you'll be using FileInvite instead of your usual process. It's as simple as "Hey, for your application we'll be sending you a link to a secure portal that not only protects the data that you upload but allows us to process your application much faster and easier!"
The key here is to inform them of the Security Benefits of FileInvite, as well as its ability to get their application processed faster and easier.
2. Setup Custom Branding
Custom branding is super easy to set up, just requiring a logo and choosing your company's color. But once enabled this helps to build a high level of trust with your clients to improve their experience with their brand.
Custom Branding is set on:
- The Client portal
- Any FileInvite Emails sent to your Client
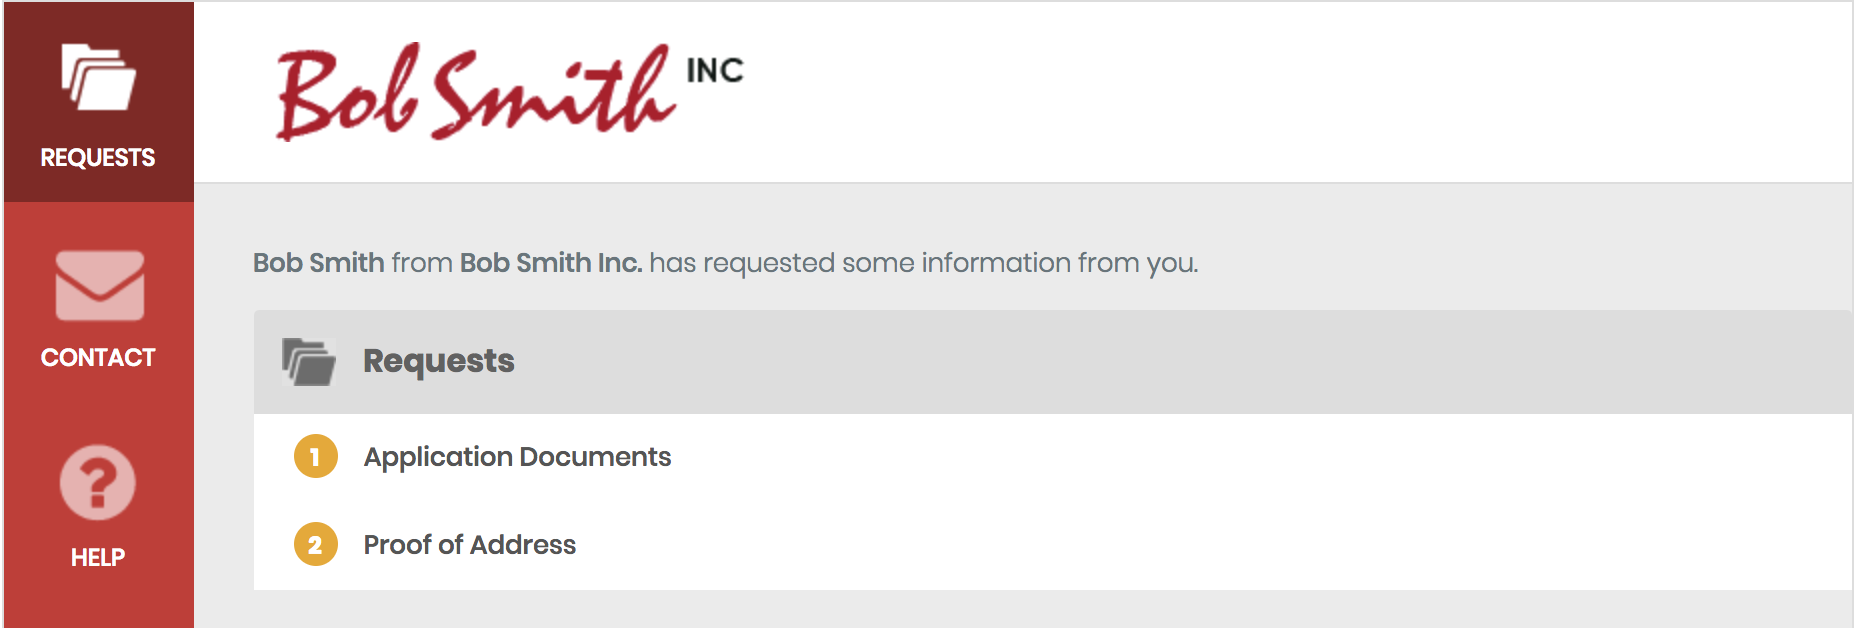
3. Setup up your Templates & Requests to be Clear and Actionable
By clearly laying out exactly what it is the User needs to do, and any problems you usually experience, the usual barrier of Clients returning incorrect documents or struggling to return anything will be lowered.
- Ensure the Request Title is clear i.e. ID (Passport/Drivers License)
- Ensure your Description explains exactly what to do i.e. Please upload a copy of your Passport/Drivers License
- Use formatting to highlight any special situations they need to be aware of i.e. If you are not a citizen we require a copy of your Visa also.
- You can also let them know that they can upload using their mobile device camera to make their life so much easier too! They just hit the Upload button and choose their camera from the options that come up.
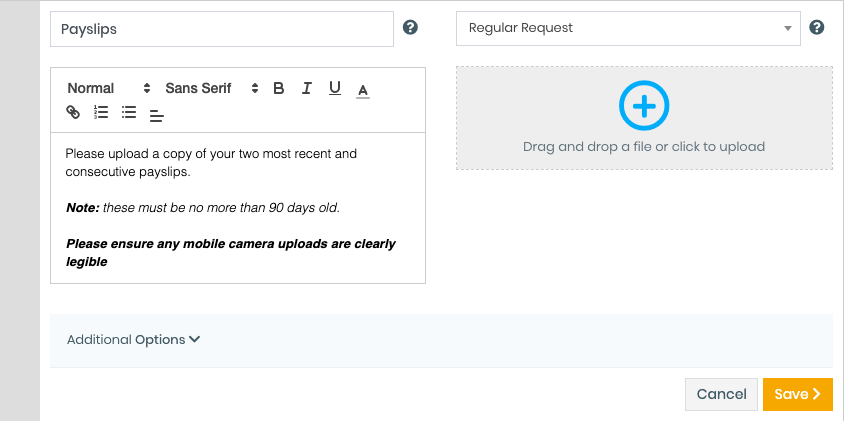
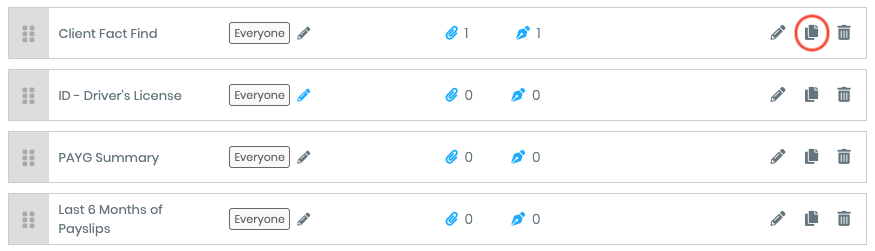
Tip: Build a master Template of all your most common Requests so you can simply duplicate this and work around the hard work you've already done! You can also check our Request Description Samples for your reference.
Tip: To make it super quick to repeat any reoccurring descriptions you can Duplicate a Request to copy all the content across to your next Request, so you don't need to start from scratch.
4. Talk about Security/Privacy in your initial messaging
FileInvite is here to keep your clients and yourselves secure, so shout about it!
The Invite/Template message is a great place to do this, as it'll go out in the initial email to your clients.
The text below can fit in well:
The Client Portal where you can submit your files from is secured by design, and your information is kept safe. Your personal information that is submitted will only be used for the purposes of your application through the portal, or for supporting this use. This is done through FileInvite a third party, and all information on security and privacy can be found below;