Creating an Invite from a Template
This article explains how to create a new Invite using one or more templates. FileInvite provides several built-in templates, and you can also create and use your own.
If your Fileinvite Login URL ends in fileinvite.com, please use this knowledge base instead.
Getting Started
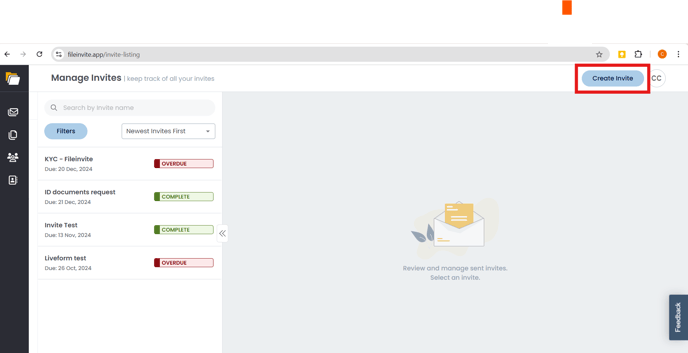
To begin, click Create New Invite in the top-right corner of any FileInvite page.
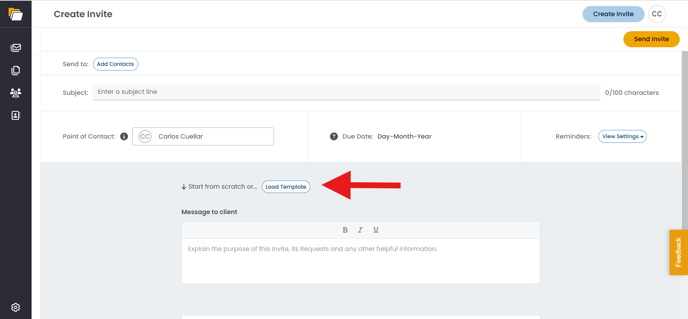
Template Loading Process
The Load Template option is now prominently displayed at the top of the invite creation form for quicker access and a smoother workflow.
Steps:
-
Click Load Template
-
Select one or more templates from the Template Selection window
-
The form will auto-populate with the selected template’s settings
-
Continue adding Contact Information, assigning a Due Date, and adjusting Point of Contact and other options as needed
Auto-Populated Invite Name: When you select a template:
- The Invite Name field automatically populates with the template name
- You can override this with a custom name for better organization
- Use specific identifiers like "Johnson Mortgage - Template A" to distinguish between multiple invites
Selecting and Merging Templates
In the Template Selection window, you’ll find:
-
-
A list of available templates
-
A search bar to quickly locate a specific template
-
- Using One Template
-
Click a single template to enable the Load Template button
-
Click Load Template to apply it to your Invite
-

- Using Multiple Templates
-
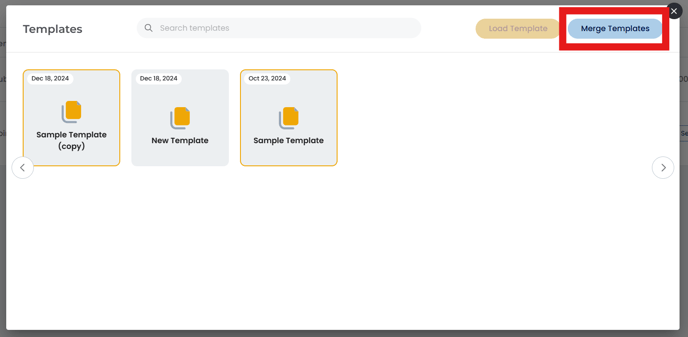
Select more than one template to enable the Merge button
-
-
- Click Next and then Load to finalize your selections.

-
-
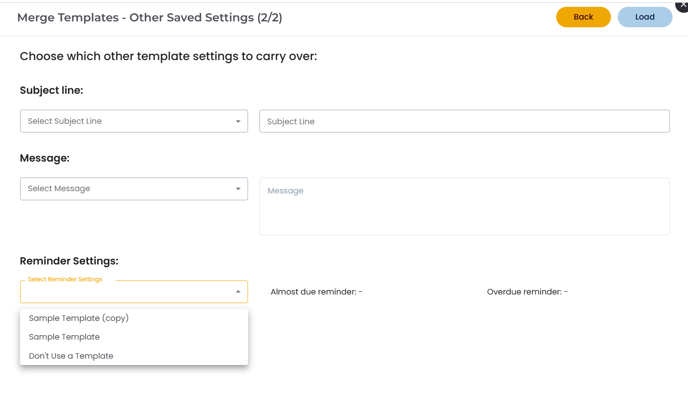
The merge process walks you through:
-
Selecting which requests to include from each template
-
Choosing which template's Subject Line, Message, and Reminder Settings to use
-
-
Organizing Grouped Requests
Templates now support pre-organized request groups, making your Invites more structured and client-friendly.
-
When a template includes groups, they’ll be loaded automatically
-
Use the Organize Requests feature to:
-
Add or rename section headers
-
Drag and drop requests into different groups
-
Reorder groups for emphasis
-
Duplicate Group Functionality:
After creating your first request group, you can duplicate it using the Duplicate Group button
- The duplicated group will be named "[Original Name] Copy"
- Modify the duplicated group as needed for similar document requirements
- You can fully customize the grouping structure before sending.
Adding Contacts
After loading the template and configuring requests:
-
Add individual contacts manually
-
Or use Add all Contacts from Company to quickly invite all recipients associated with a particular company
Adding Team Members and Watchers
You can assign Assignees, Teams, and Watchers directly during invite creation. In the Create Invite header, you'll see new fields for:
- Assignee: Select the team member responsible for this invite
- Team: Choose which team should have access to this invite
- Watchers: Add team members who should receive notifications
Removing Watchers: Once watchers are added, you can remove them by clicking the "X" next to their name in the watchers list.
Templates now remember company associations, allowing you to populate recipients more efficiently in common use cases
Final Steps Before Sending
-
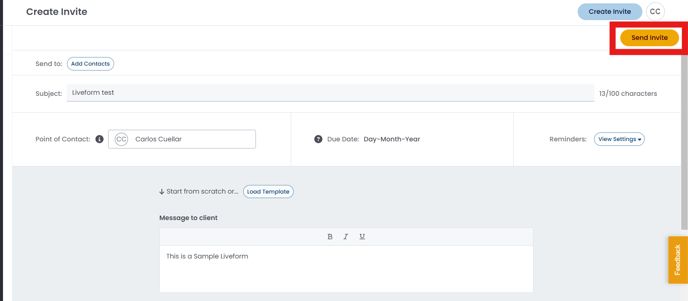
Review the Subject, Due Date, Reminders, and Point of Contact
-
If you have team members in your account, you can assign the invite notifications to another user by checking the box next to Point of Contact
-
Once everything is ready, click Send Invite
Note: By default, the email will come from you. But if you have team members in your account, you can end Send the invite and assign the notifications from it to another User, by clicking the box next to Point of Contact.
Supported file types and size business rules
Supported File Types for Creating an Invite (App)
-
File Request:
-
Users can attach up to 10 documents.
-
Maximum size: 100MB per document.
-
Supported file types: .pdf, .csv, .doc, .docx, .xls, .xlsx, .ppt, .pptx, .txt, .jpg/.jpeg, .heic, .heif, .png.
-
-
Form Request:
-
Only PDF files are allowed.
-
Maximum size: 100MB per PDF.
-
Supported File Types for Portal Upload (End Users Portal)
-
File Request:
-
End users can upload up to 10 documents.
-
Maximum size: 100MB per document.
-
Supported file types: .pdf, .csv, .doc, .docx, .xls, .xlsx, .ppt, .pptx, .txt, .jpg/.jpeg, .heic, .heif, .png.
-
*Note:
.heic and .heif files can only be uploaded via macOS or iOS devices. If you or your client are using a Windows system, these files will need to be converted to a more common format—such as JPEG or PNG—using an image conversion app of your choice.
