If your FileInvite Login URL ends in fileinvite.com, please use this knowledge base instead.
Getting Started
Before connecting to HubSpot, ensure third-party cookies are enabled in your browser and consider logging into your HubSpot account beforehand for a smoother connection process.
How the HubSpot Connection Works
The FileInvite-HubSpot connection uses Workato to establish secure authentication between your systems. Once this connection is established, the FileInvite team will work with you to configure custom workflow automations that may include:
- Sending document requests directly from HubSpot
- Automatically syncing document status updates to your CRM
- Triggering notifications based on document collection milestones
- Creating custom data flows tailored to your business processes
Steps to Connect HubSpot to FileInvite
- Navigate to Integrations
- From your FileInvite Dashboard, go to Settings (gear icon in the sidebar)
- Select Integrations from the settings menu

- Locate HubSpot
- Scroll to the Managed Integrations section
- Find the HubSpot card
- Initiate Connection
- Click the Connect button on the HubSpot card
- A connection window will appear with Advanced settings and Custom OAuth profile sections

- Review Integration Scopes (Optional)
- Before clicking Connect, you can review the permissions (scopes) that will be requested by expanding the Advanced settings section
- Click Show to expand the Advanced settings
- The Scopes dropdown displays which HubSpot data the connection will access
- Most users can proceed with the default scopes, which provide the necessary permissions for the FileInvite team to configure your workflows

- Connect to HubSpot
- Once you've reviewed the settings (or if you're proceeding with defaults), click the Connect button at the bottom of the window
- A Workato authentication window will appear

- Sign In to HubSpot
- Click Sign in to your HubSpot account
- If you're already logged into HubSpot, the connection will proceed automatically
- If not, enter your HubSpot credentials when prompted and follow the instructions on the screen to continue
- Verify Connection
- Look for the green Connection success message
- The connection timestamp confirms when the integration was established
- You can now close the connection window

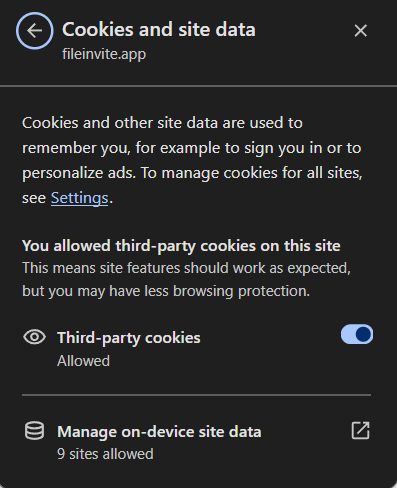
Important Notes About Third-Party Cookies
Critical Requirement: Third-party cookies must be enabled in your browser for the HubSpot connection to function properly. The Workato connector relies on these cookies for secure authentication.
To enable third-party cookies:
In Google Chrome:
- Click the three dots menu (top-right corner)
- Navigate to Settings > Privacy and security > Cookies and other site data
- Select "Allow all cookies" or "Block third-party cookies in Incognito"
- Ensure "Allow third-party cookies" is not blocked
In other browsers:
- Firefox: Settings > Privacy & Security > Cookies and Site Data > Uncheck "Block cookies"
- Safari: Preferences > Privacy > Uncheck "Block all cookies"
- Edge: Settings > Cookies and site permissions > Manage cookies > Allow third-party cookies
Note: If you continue experiencing connection issues after enabling third-party cookies, try clearing your browser cache and cookies, then attempt the connection again.
Managing Your HubSpot Connection
To disconnect HubSpot:
- Navigate to Settings > Integrations
- Locate the HubSpot card in the Managed Integrations section
- Click the user icon to open connection details
- Click the Disconnect button
- Confirm the disconnection when prompted
To view connection details:
- Click the user icon on the HubSpot card
- View the connection timestamp and status
- Access advanced settings if configuration changes are needed
Best Practices
💡 Before connecting:
- Log into your HubSpot account in the same browser
- Verify third-party cookies are enabled
- Ensure you have administrative permissions in both FileInvite and HubSpot
Next Steps: Configuring Your Workflows
Once your HubSpot connection is established, contact the FileInvite team to discuss your business requirements and configure custom workflow automations. The team will work with you to set up:
- Document request triggers based on your CRM activities
- Status update synchronization between systems
- Custom notifications and alerts
- Data mapping that aligns with your business processes
For more information about workflow configuration or to schedule a consultation, contact FileInvite sales or reach out to your account representative.
🎉 Success! Your HubSpot connection is established and ready for workflow configuration! 🎉