If you're having trouble with Invites, be sure to check out our Invite Troubleshooting Guide for step-by-step solutions and helpful tips.
When creating a new blank Invite, or an Invite from a template, there is a link at the top for Additional Settings. Clicking this link opens a flyout window where these settings can be adjusted.
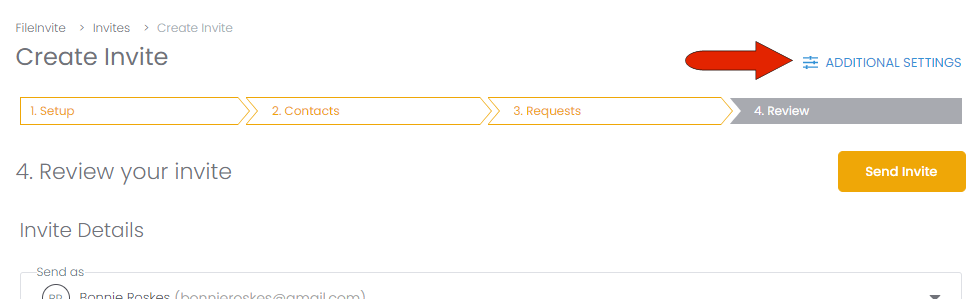
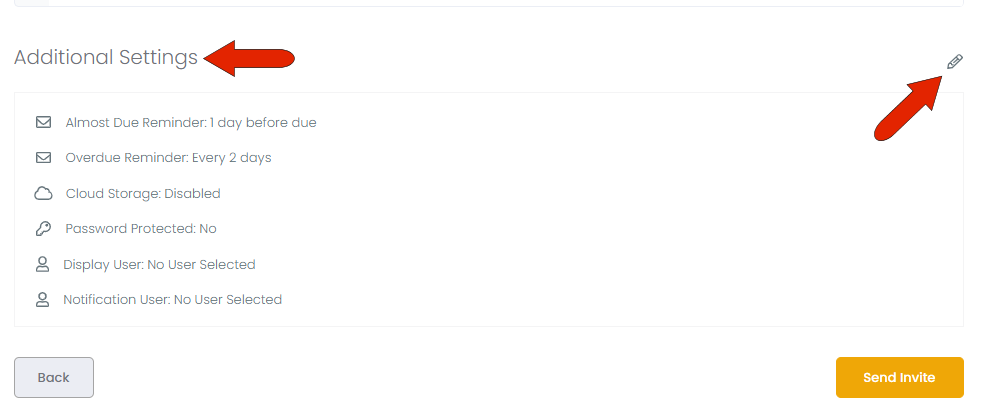
The Additional Settings are also displayed at the bottom of the new Invite, just above the Send Invite button. These settings have an Edit icon, which also opens the flyout.
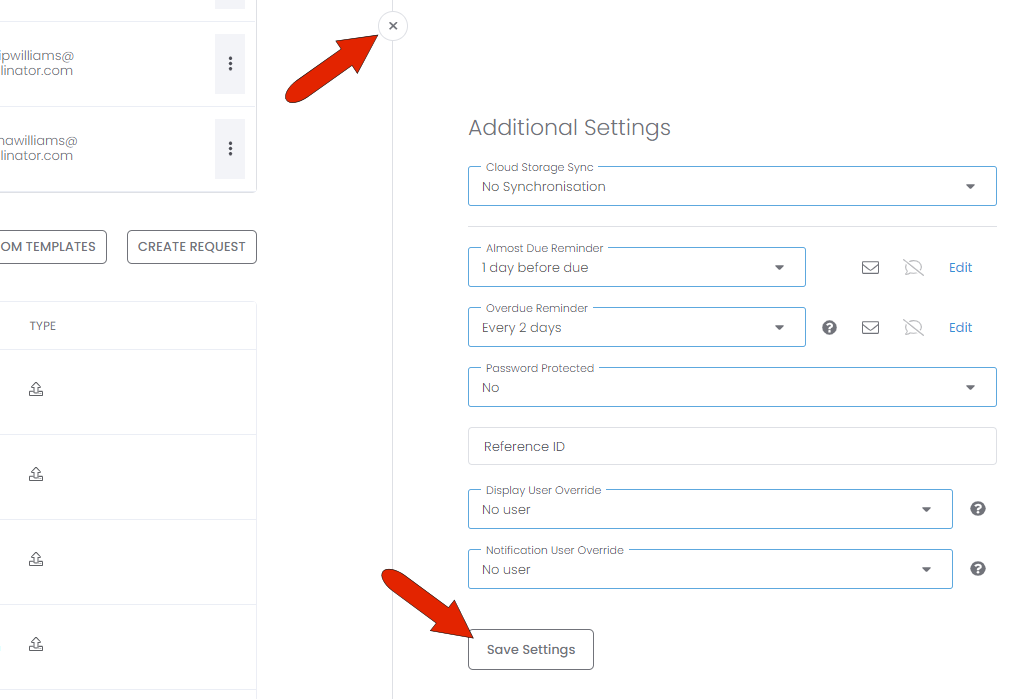
The Additional Settings flyout opens to the right, and can be closed by clicking the X icon. If you make any changes, click Save Settings.
-
Cloud Storage Sync: If you want backups for your documents, choose one of the cloud storage options such as Google Drive or Dropbox.
-
Almost Due Reminder: Choose when the client will be notified that their documents are due. By default, reminders are sent out 1 day before the due date. Reminders can be sent via email and/or SMS, and the default setting comes from the Preferences.
-
Overdue Reminder: Choose the frequency by which the client will be notified that their documents are past due. Like with Almost Due Reminders, these reminders can be sent via email and/or SMS.
-
Password Protected: Enabling this option provides an extra layer of security, by enabling clients to set a password to access their Client Portal.
-
Reference ID: For bookkeeping purposes, you can assign a reference number for the Invite.
-
Display User Override: Choose the user who will be listed as the Invite sender instead of you.
-
Notification User Override: Choose the user who will be notified of Invite activity instead of you.
Invite overdue reminders will automatically stop 14 days after the due date or when your client clicks “I’m Finished” in their Client Portal — whichever happens first.